Our Nourishing Table main logo
  • Recipes
  • Cookbook
  • Shop
  • Recipes
  • Cookbook
  • Shop

  • About Sarah
  • Work With Me

GET my debut cookbook!

‘Our Nourishing Week’

GET my debut cookbook!
‘Our Nourishing Week’

order now
Home > Recipes > Meal type > Healthy Treats
Healthy honey marshmallows cut into squares.

Healthy Marshmallows – Honey Marshmallows

  • DF
  • EF
  • GF
  • NF

5 from 2 votes
Prep Time 20 minutes mins
Set Time 1 hour hr 30 minutes mins
Total Time 1 hour hr 50 minutes mins
A delicious and healthy homemade marshmallow recipe, made without using corn syrup! These honey marshmallows can be used in hot chocolates, rocky road, for healthier smores and more!
Jump to Recipe
27 August 2021
August 26, 2025

by

Sarah Bell

Disclosure: This page contains affiliate links, which I earn a small a commission from when you purchase through a link, at no extra cost to you. Thank you for your support!

Share the Love!

  • Facebook55
  • X

Homemade marshmallows without corn syrup! These delicious, fluffy marshmallows are naturally sweetened, using honey. Gelatin can help to improve gut health by providing essential amino acids for healing the gut lining. See the full guide for making these healthy marshmallows below.

Healthy honey marshmallows cut into squares.
Contents:
  1. Homemade Marshmallows Without Corn Syrup!
  2. How to Make Honey Marshmallows
  3. Healthy Marshmallows for Gut Health
  4. Loved these Honey Marshmallows? You might like to try these healthy treats..
  5. Honey Marshmallows – Healthy Marshmallow Recipe!

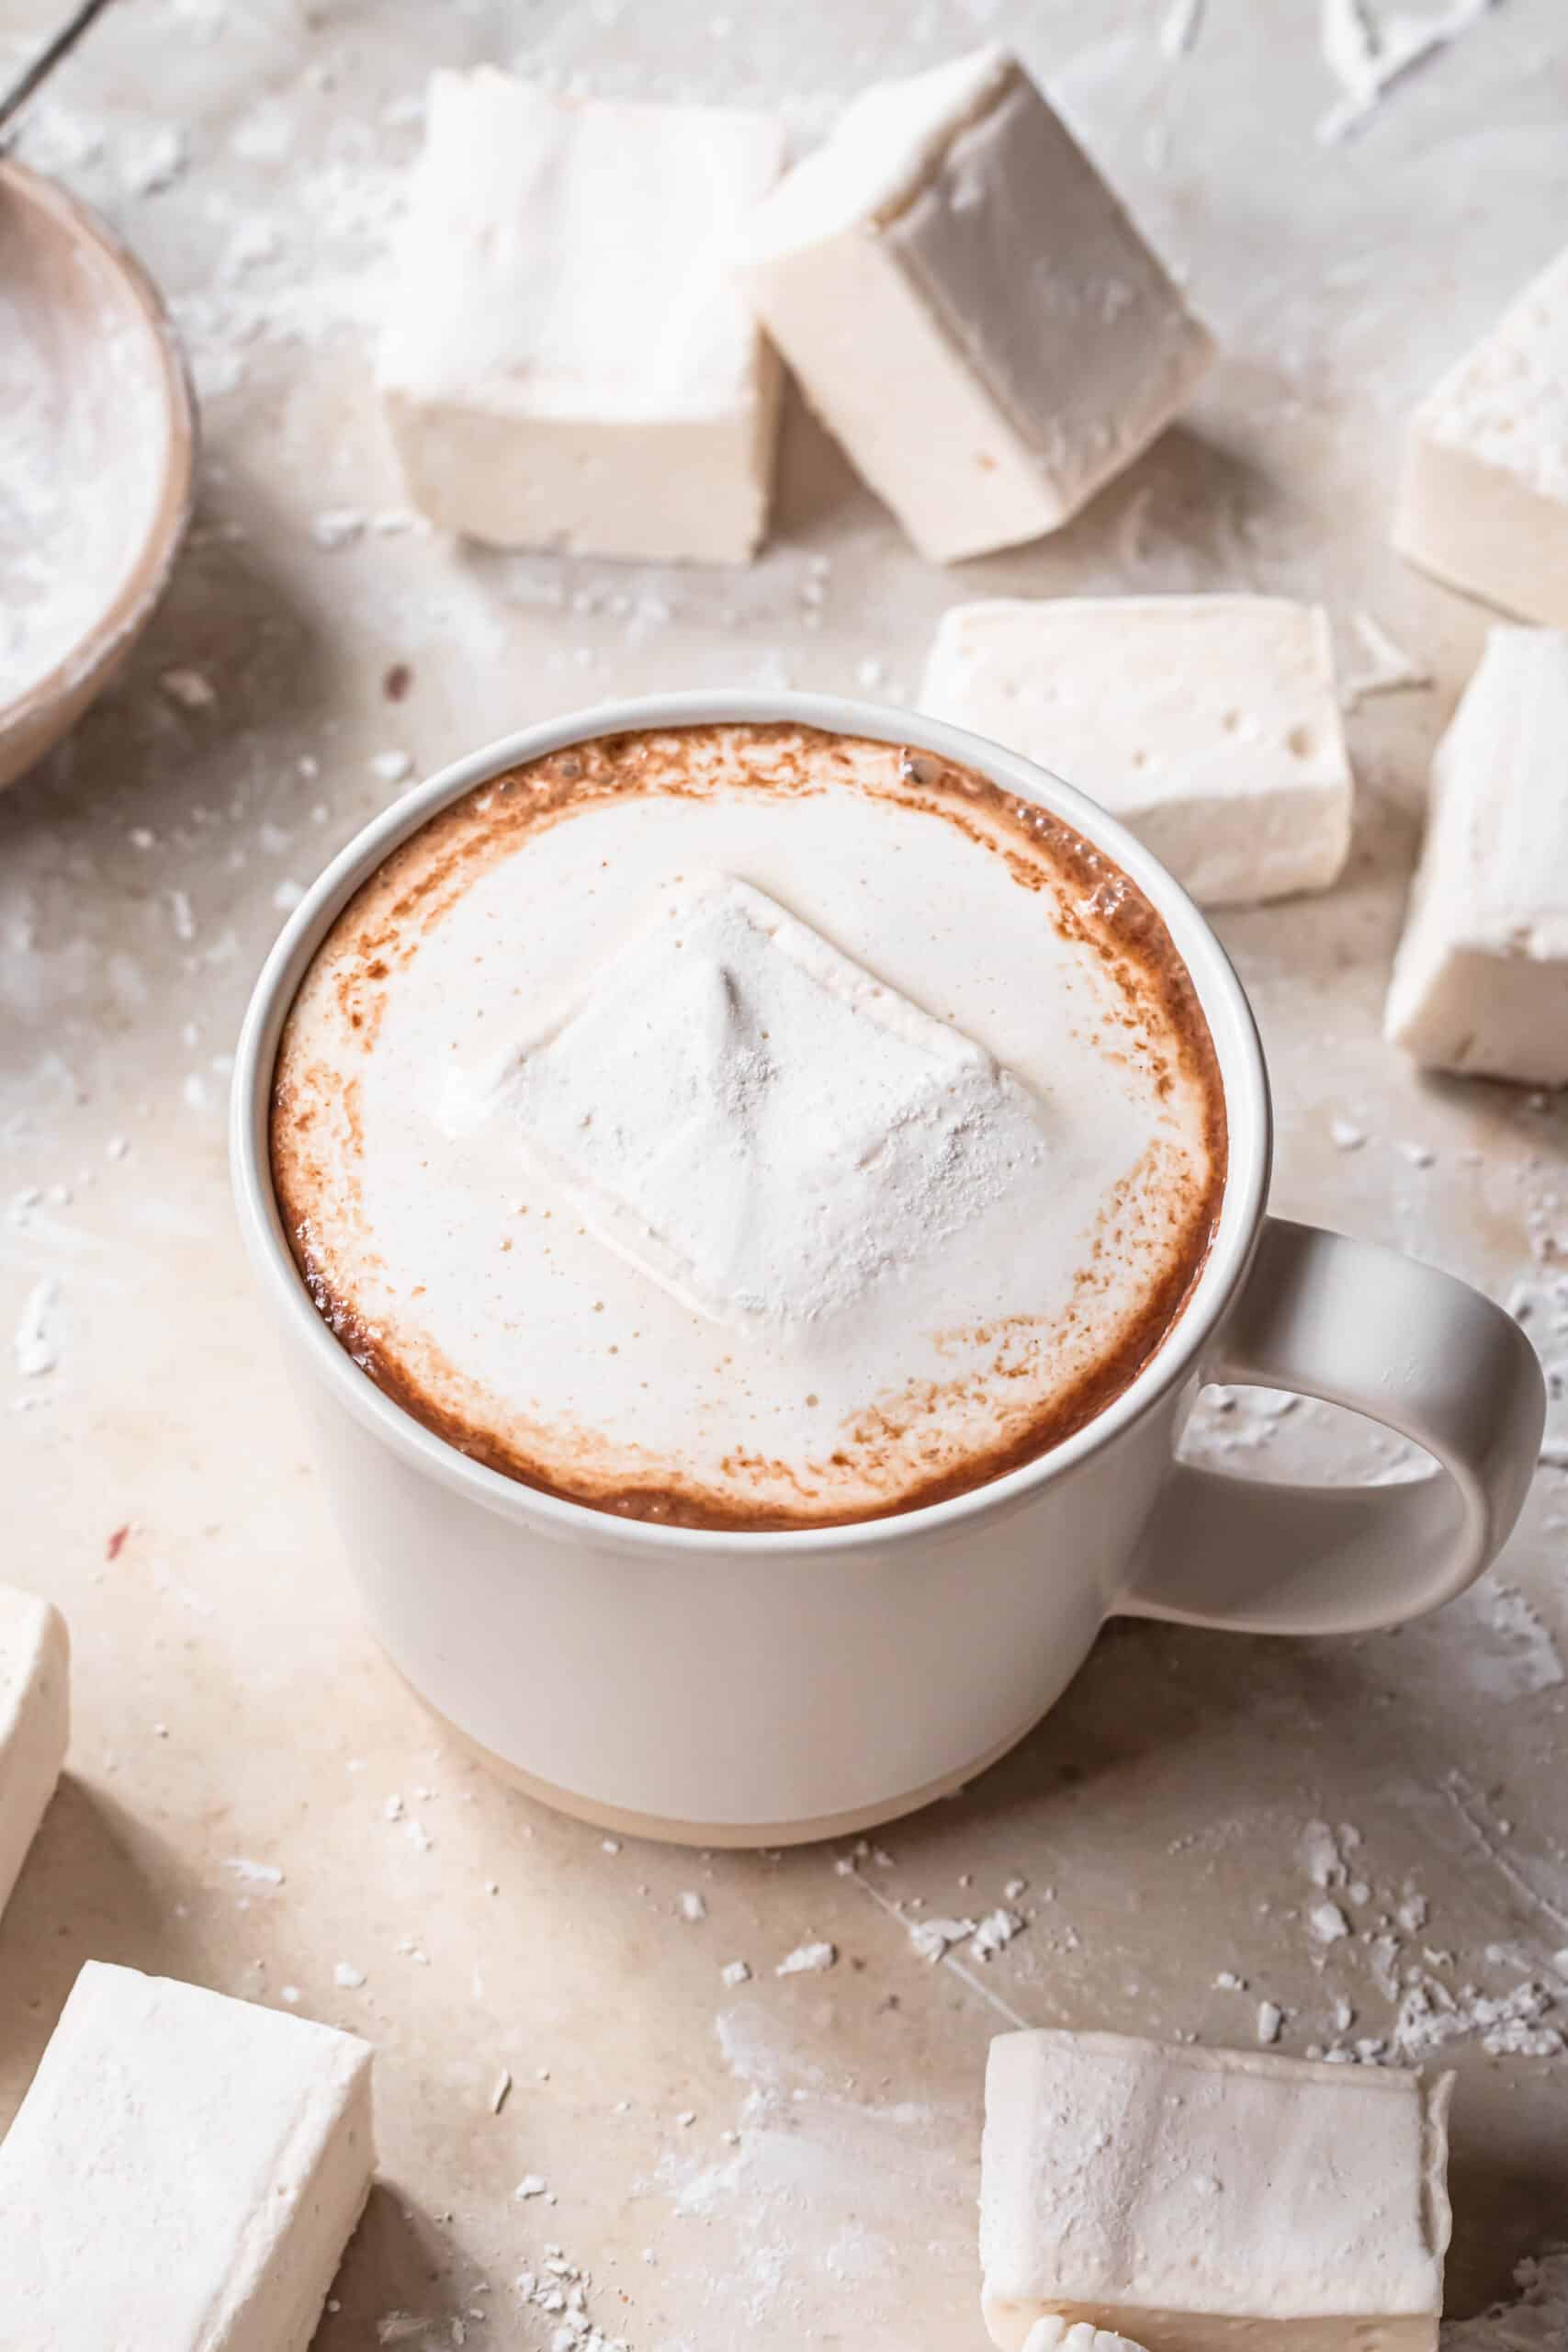
Making your own homemade marshmallows is so fun and satisfying! These honey marshmallows are delicious in my Oat Milk Hot Chocolate or Healthy Rocky Road. Or just eat them as they are!

Oat milk hot chocolate with a healthy marshmallow melting on top.

Homemade Marshmallows Without Corn Syrup!

These fluffy, homemade marshmallows are made using honey instead of sugar and corn syrup. There are just five ingredients:

  • honey
  • gelatin
  • water
  • option to add vanilla, rose water or other flavours
  • tapioca starch for dusting
Ingredients for homemade honey marshmallows.

How to Make Honey Marshmallows

These delicious honey marshmallows may sound daunting to make, but follow my instructions below and you’ll see just how easy they are!

Bloom the Gelatin

To bloom the gelatin, add water to a large mixing bowl and sprinkle the gelatin over the top. Stir through briefly and then set aside for around 5 minutes. The gelatin will begin to absorb the water instantly.

Gelatin in a bowl with water.

Assemble Equipment

Once the honey syrup is ready to go (Step 3), you will need to work very quickly! That is why it is important to have all of your equipment assembled and ready to go before starting the honey syrup. If you’re adding an additional flavour, such as vanilla extract or rose water, have this out on the bench with the rest of your equipment also.

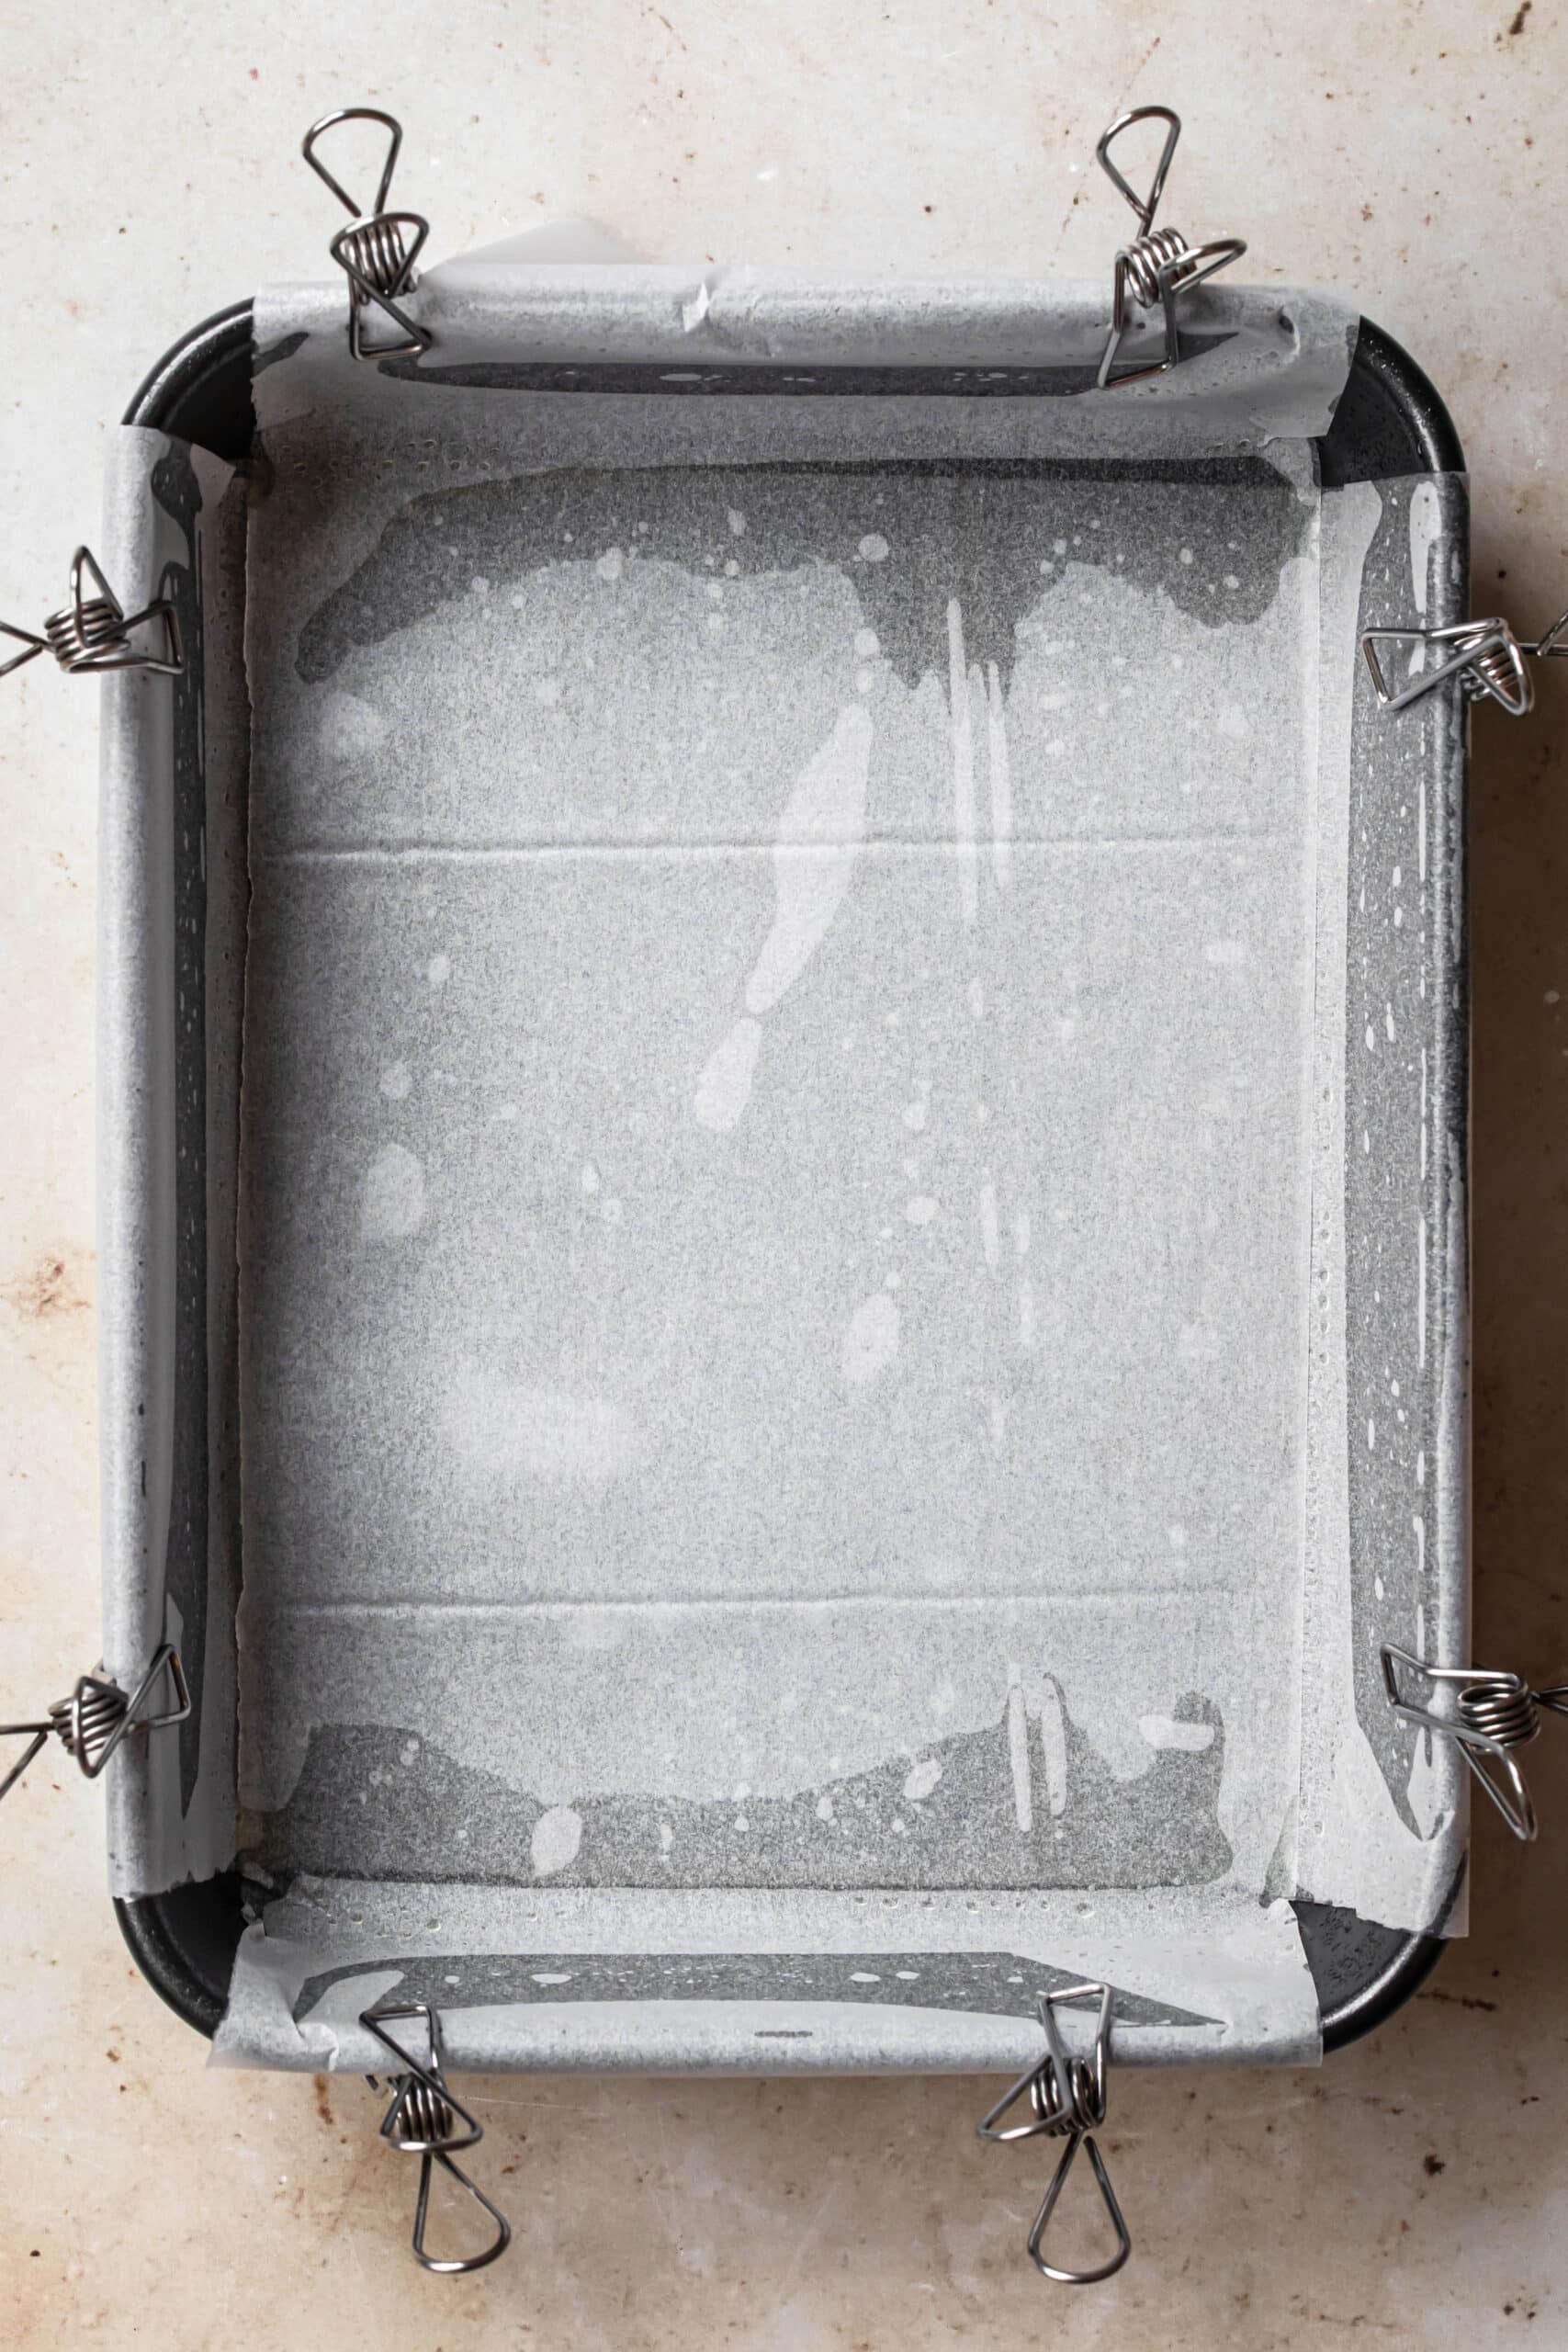
Have your pan lined and dusted with tapioca starch, ready to go. I like to hold the sides of the parchment paper down with stainless steel pegs.

Baking paper lined tin, with the baking paper fixed using stainless steel pegs.
Baking paper lined tin dusted with tapioca starch.

Make the Honey Syrup

To make these marshmallows healthier, we use honey instead of sugar and high fructose corn syrup.

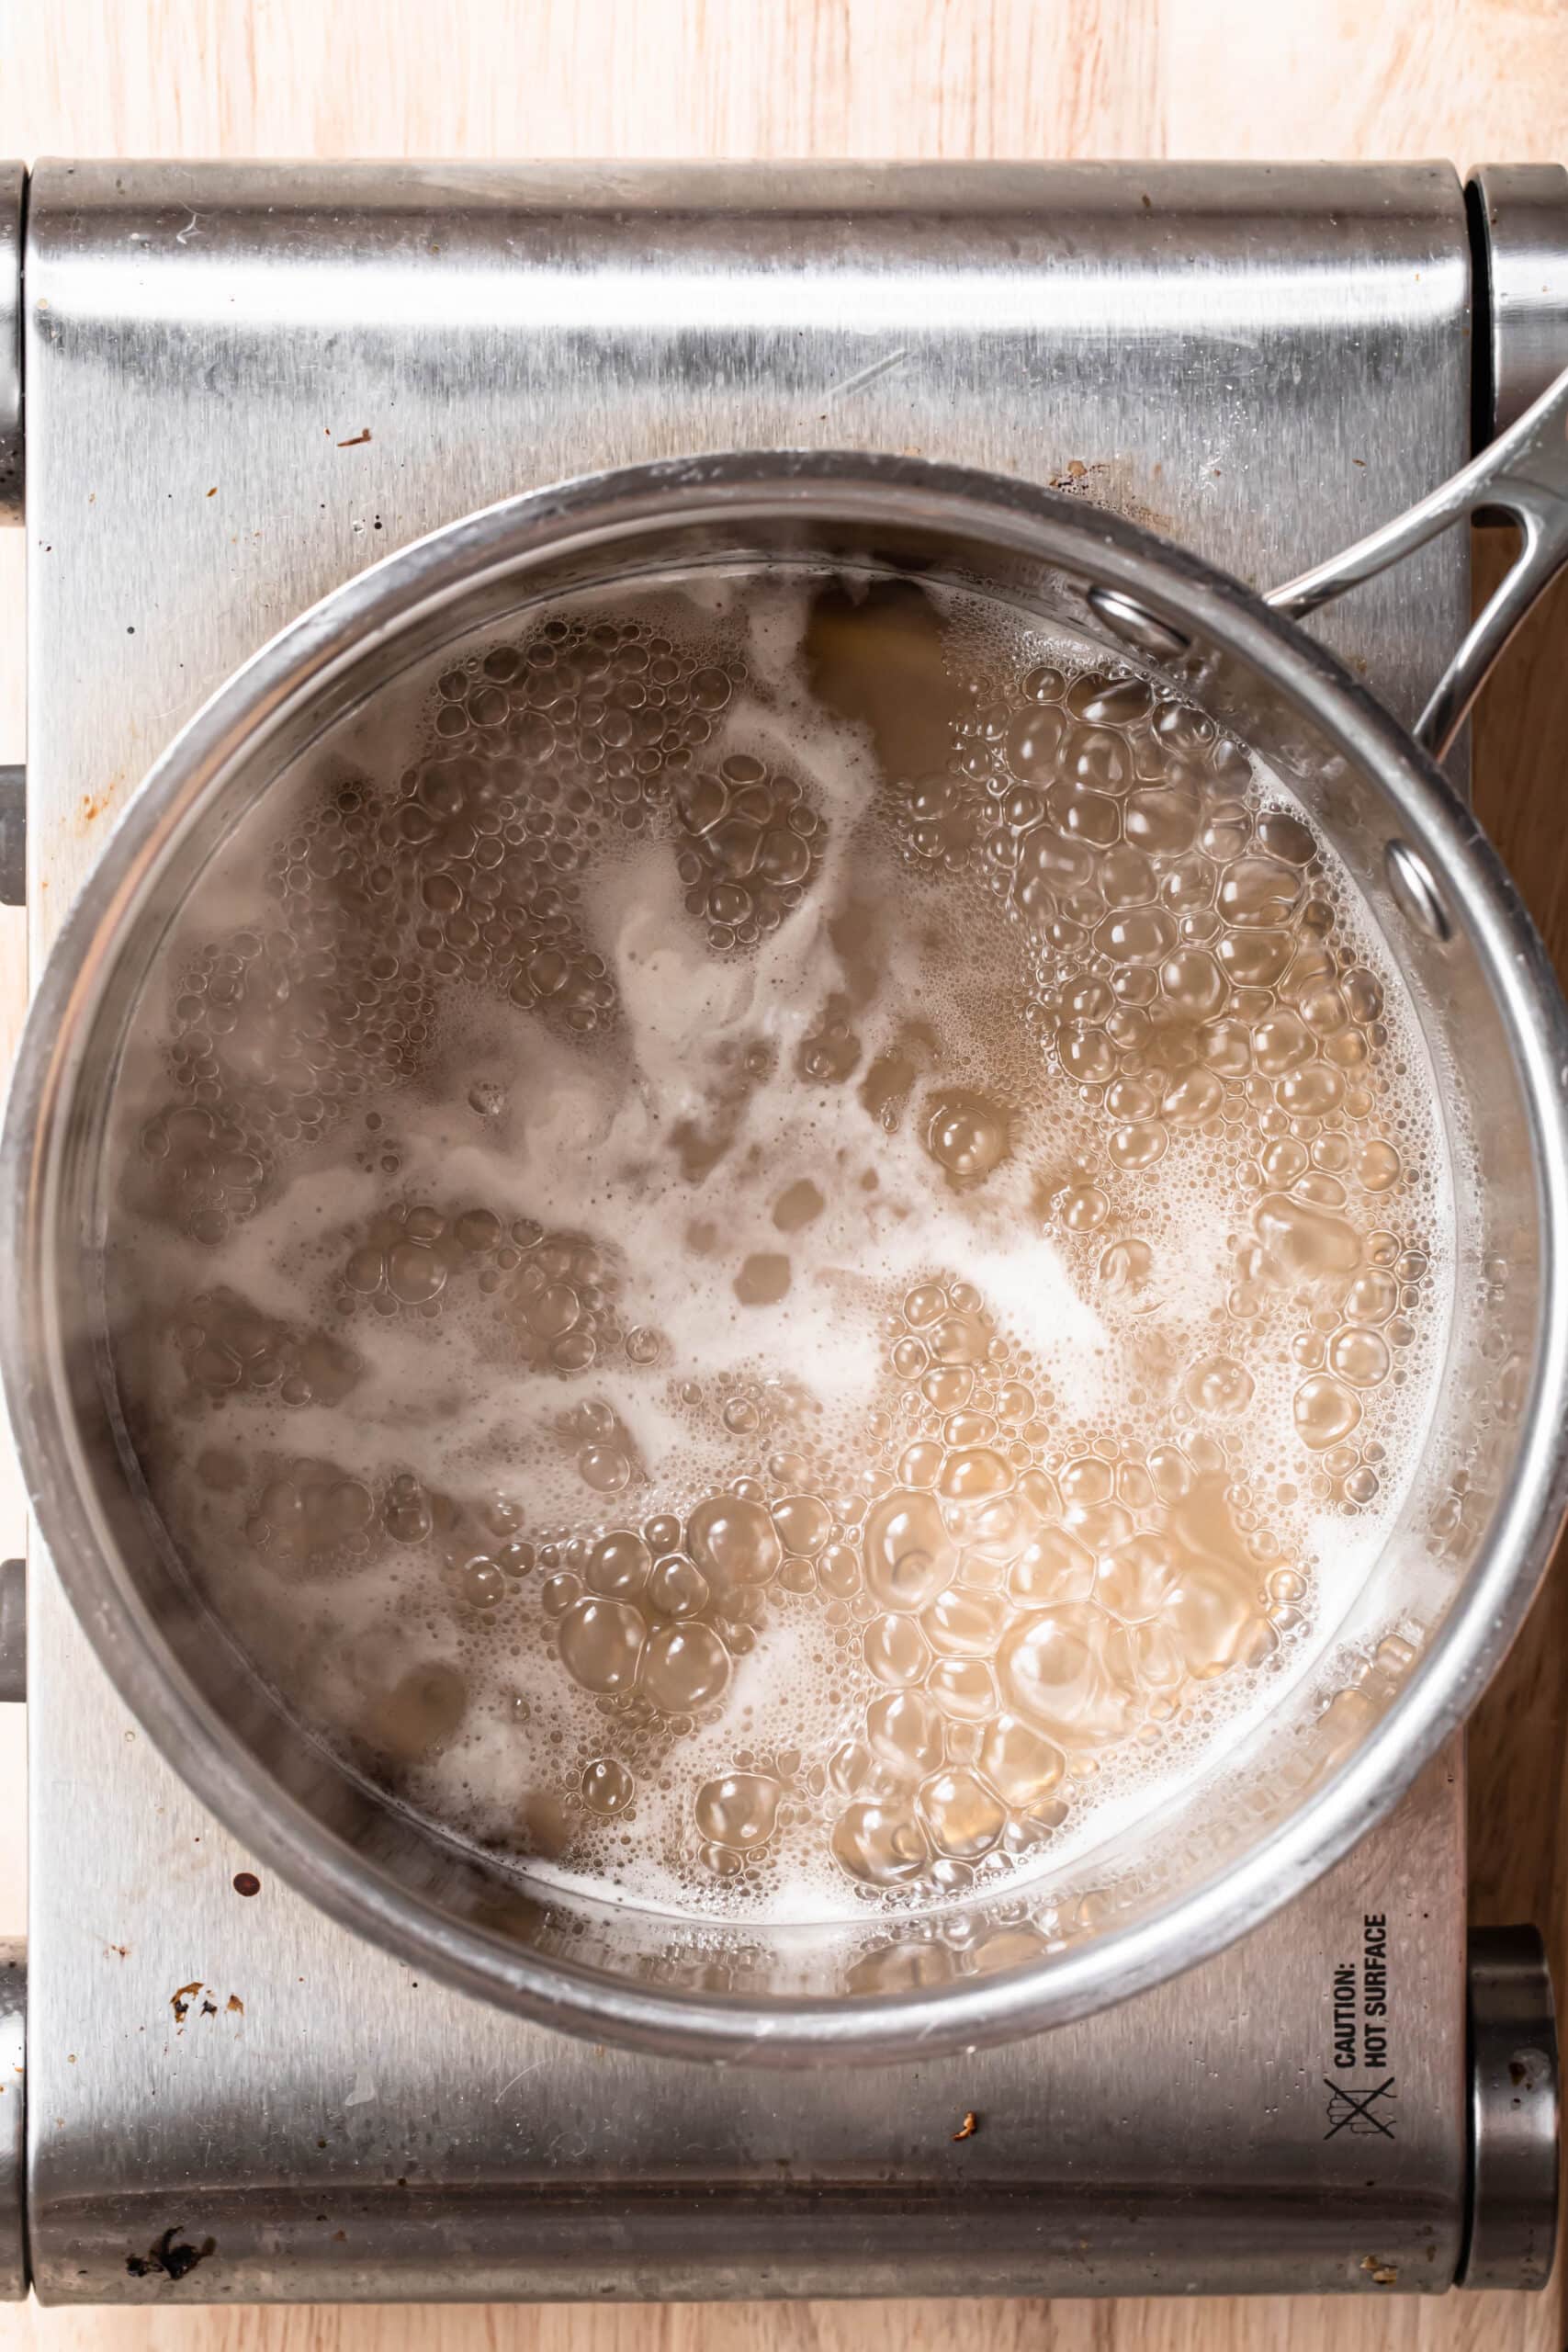
To make the honey syrup add the water and honey to a large saucepan and whisk to combine. Bring to a boil until the liquid reaches between 116-118 degrees Celsius. If you don’t have a candy thermometer you can boil the liquid for 5 minutes.

Water and honey added to a saucepan.
Water and honey in a saucepan, boiling.

Make the honey marshmallow fluff

Now for the fun part! To make the marshmallow fluff, start pouring the honey syrup into the bowl with the gelatin, while beating with electric beaters. Alternatively you can use a stand mixer.

Would you like to save this?

We’ll email this post to you, so you can come back to it later!

The gelatin will begin to dissolve and incorporate into the honey. If you are adding vanilla extract or rose water do so now.

As you continue to beat the mixture, the gelatin begins to cool and tiny air bubbles get trapped within the mixture. Once the mixture is white and fluffy it is ready.

Gelatin mixed with honey syrup, being beaten with electric beaters.
Marshmallow fluff in a bowl.

As soon as the mixture is white and fluffy, stop beating and pour into the prepared baking tin straight away. You need to act quickly here as the marshmallow will begin to set and become difficult to work with. Use a spatula or palette knife to spread the marshmallow smoothly.

Place the marshmallow into the fridge to set for around one and a half hours.

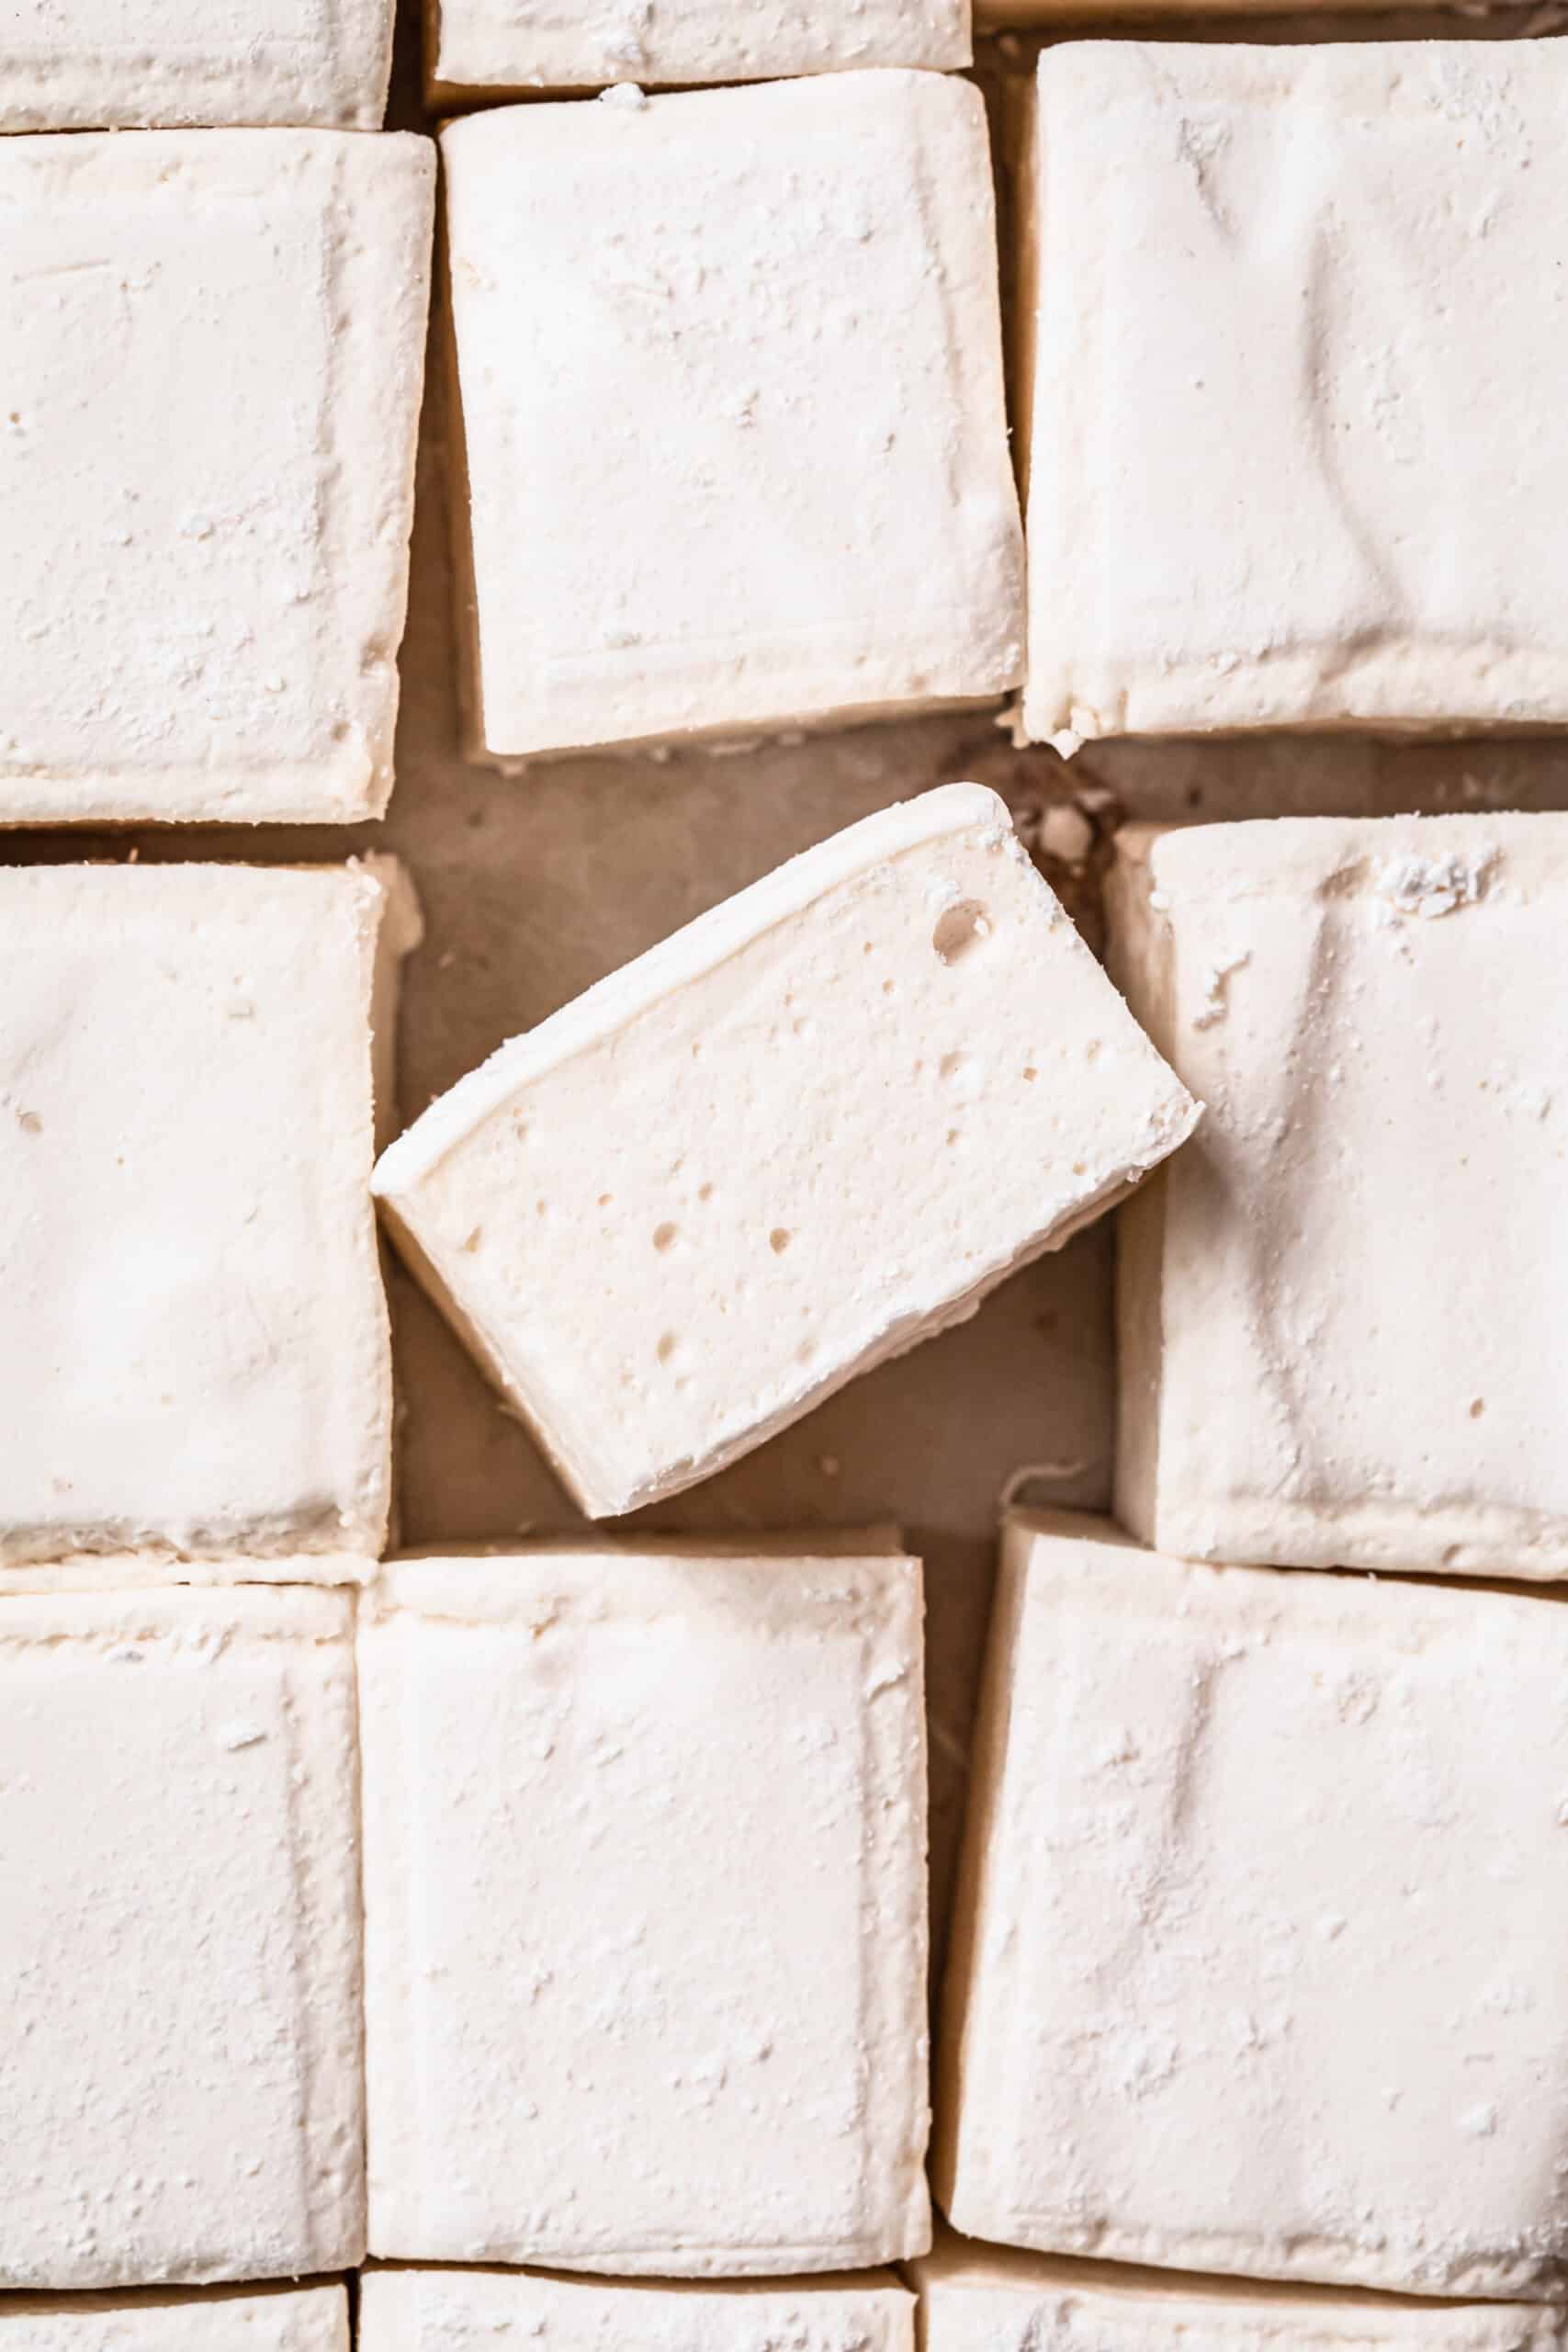
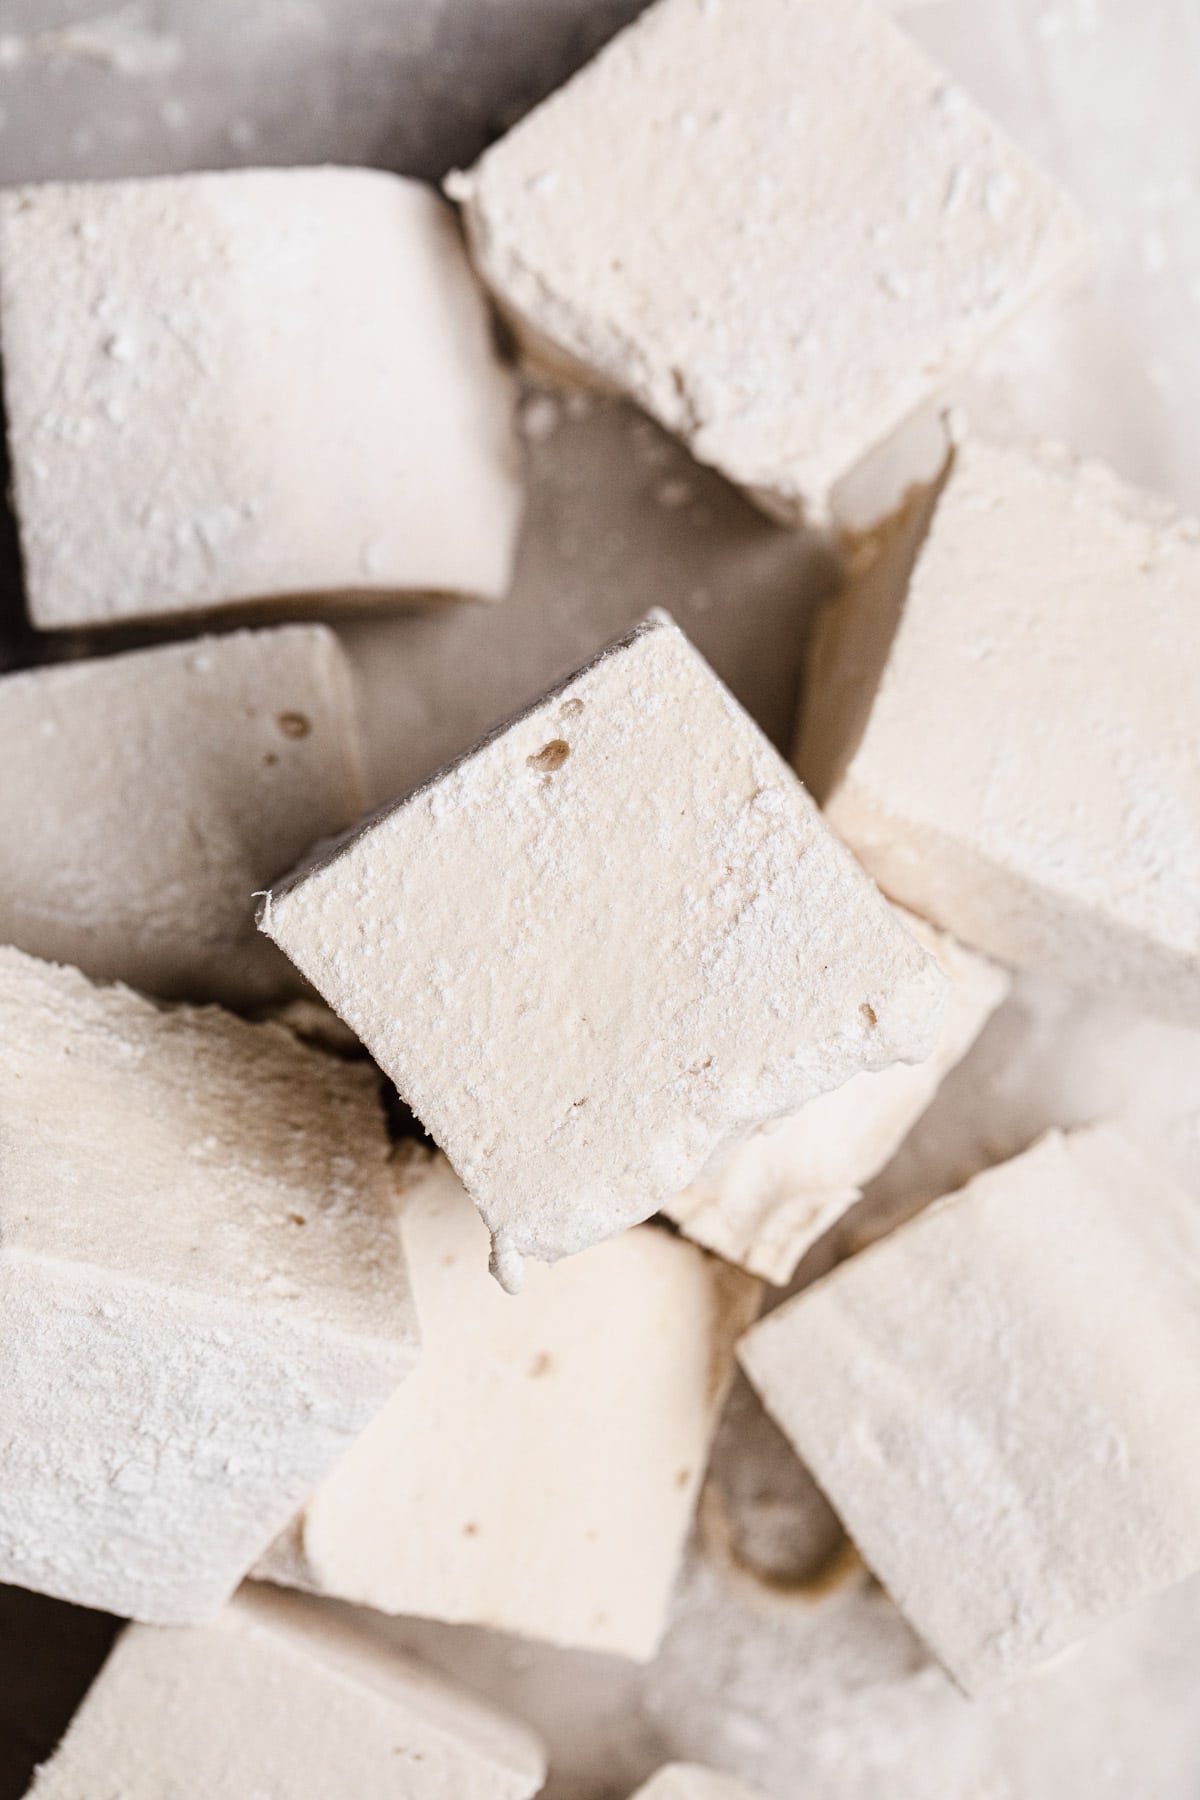
Cut the Marshmallows

Once the marshmallows have set, remove from the fridge and dust with tapioca starch or arrowroot. Use a sharp knife, also dusted with tapioca starch or arrowroot to slice.

Lightly dust the marshmallows in more tapioca starch or arrowroot flour and toss to coat, before storing in an airtight container in the fridge.

Homemade marshmallows sliced up and dusted with tapioca starch.

Healthy Marshmallows for Gut Health

To make this honey marshmallow recipe, you will need Powdered Gelatin. Gelatin is derived from beef. I prefer to use a gelatin that is made from grass fed/pasture raised and free range beef, making it a more ethical product.

Gelatin can help to improve gut health as it rich in proline and glycine. These two essential amino acids help to regenerate the gut lining and reduce gut inflammation.

Loved these Honey Marshmallows? You might like to try these healthy treats..

Healthy Rocky Road

Almond Butter Dark Chocolate Cups

Honey, Rose & Macadamia Fudge

Raw Salted Caramel Choc Slice

Honey Marshmallows – Healthy Marshmallow Recipe!

5 from 2 votes
By: Sarah Bell
A delicious and healthy homemade marshmallow recipe, made without using corn syrup! These honey marshmallows can be used in hot chocolates, rocky road, for healthier smores and more!
healthy marshmallows made with honey, cut into cubes
print pin Leave Review
Prep Time 20 minutes mins
Set Time 1 hour hr 30 minutes mins
Total Time 1 hour hr 50 minutes mins
Servings: 20 marshmallows

Equipment

  • Large mixing bowl
  • Electric Beaters or Stand Mixer
  • Spatula
  • Measuring Cups
  • Rectangular Cake Baking Tin or Medium Sized Baking Dish
  • Baking Paper
  • Saucepan
  • Whisk
  • Seive

Ingredients

  • ¼ cup gelatin, grass-fed
  • ½ cup water
  • Tapioca starch for dusting pan
  • ½ cup water
  • ¾ cup Honey, raw
  • 3 tsp rose water, or vanilla extract, optional
Prevent your screen from going dark

Instructions 

  1. Pour ½ cup water into a medium bowl. Sprinkle gelatin evenly over the top of the water, stir together briefly and then leave to bloom.
    ½ cup water, ¼ cup gelatin grass-fed
  2. Line a slice tin or medium sized baking dish with baking paper and dust with a fine layer of tapioca starch. Set aside.
    Tapioca starch for dusting pan
  3. Transfer the bloomed gelatin to a large mixing bowl and have electric beaters and a spatula out and ready to use.
  4. Add honey and water to a saucepan, whisk to combine. Place saucepan onto a high heat and bring to a boil for 7 minutes or until the temperature of the liquid is 116 – 118 degrees Celsius when tested with a candy thermometer. Once the liquid reaches this temperature, turn off the heat.
    ½ cup water, ¾ cup Honey raw
  5. With electric beaters in one hand, slowly pour honey syrup into the bloomed gelatin while beating to combine. Beat for 8 minutes, slowly increasing the speed. If adding vanilla ectract or rose water, add now while still beating.
  6. Once the mixture is white and fluffy, pour into the pre-prepared baking tin or dish straight away – it is important to work quickly here as the marshmallow will begin to set. Place the marshmallow into the fridge for 1 and a half hours to set.
  7. Once the marshmallow is set, remove from the fridge and use a sharp knife, dusted in tapioca starch, to cut into cubes. Dust each cube in tapioca starch and store in an airtight container, between layers of baking paper to prevent sticking.

Notes

Storage

Store in an airtight container in the fridge for up to 5 days. These marshmallows can also be frozen and defrosted as required. 

Nutrition

Calories: 49kcalCarbohydrates: 10gProtein: 3gFat: 1gSaturated Fat: 1gPolyunsaturated Fat: 1gMonounsaturated Fat: 1gSodium: 7mgPotassium: 7mgFiber: 1gSugar: 10gVitamin C: 1mgCalcium: 3mgIron: 1mg
Course: Sweets
Cuisine: American,nut free,Paleo
Diet: Diabetic,Gluten Free,Low Lactose
Keyword: gelatin,healthy marshmallows,marshmallow
Tried this recipe?Post your recreation to Instagram and mention @ournourishingtable or tag #ournourishingtable! Don’t forget to let us know how you went by rating this recipe and commenting below.

Did you make this recipe? Let us know how you went by rating the recipe commenting below.

For more healthy eating inspiration follow Our Nourishing Table on Pinterest, Instagram, Facebook and TikTok.

You might also like…

honey balsamic dressing in jar, honey being drizzled in.
Condiments
  • DF
  • EF
  • GF
  • NF

Honey Balsamic Dressing – 5 Ingredients!

Honey lime vinaigrette in a small glass jar.
Recipes
  • DF
  • EF
  • GF
  • NF

The Best Honey Lime Dressing

Close up of honey candied walnuts on a parchment paper lined baking tray.
Condiments
  • DF
  • EF
  • GF

Crunchy Honey Candied Walnuts

Honey, pecan and ginger granola in a wooden bowl topped with milk.
Breakfast
  • DF
  • EF

Healthy Honey, Pecan & Ginger Granola

My debut cookbook–Our Nourishing Week

My debut cookbook Our Nourishing Week is a collection of 85+ easy and nutritious recipes for the whole family. It includes 6 weeks of meal plans, complete with shopping lists – simplifying your family meals for an easy, healthy week – every week.

order now

Hi, I’m Sarah!

I’m a nutritionist turned healthy recipe developer who is all about creating delicious food designed to nourish. I love using wholefood ingredients and have a strong focus on gluten free, dairy free and refined sugar free recipes.

MORE ABOUT ME >

5 from 2 votes

Like this recipe? Leave a comment!

Cancel reply

Your email address will not be published. Required fields are marked *

Recipe Rating


  1. Veronica Hundley

    March 4, 2022 AT 10.49 PM

    Can these be used to make rice crispy treats? Thanks

    Reply
    1. Sarah Bell

      March 14, 2022 AT 1.34 PM

      I would recommend mixing the marshmallow mixture through the rice crisps before setting it – so once you’ve made the marshmallow fluff, rather then pouring it into a tray to set it, mix the ingredients for rice crisps straight in and then transfer to a tray to set. I haven’t tried this yet so I can’t guarantee that it will work but I’d love to hear how you go if you try it!

      Reply
      1. Jessica

        February 18, 2025 AT 4.44 AM

        I tried this! I think I let the mixture beat a little too long. I used maple syrup since that’s all I had so it didn’t turn “white”. I added 3 cups of rice crispies and 1/4 melted butter. It got really lumpy when I added the warm butter but once I added the rice crispies and mixed it the lumps went away! Put in a 9×9 square pan to set. This was definitely an experiment! Any troubleshooting tips would be great 🙂 the texture is a little different than regular Rice Krispies but I think that is because I beat the mixture for too long and then the warm butter made it clump.

        Reply
        1. Sarah Bell

          March 24, 2025 AT 12.14 PM

          They sound delicious and love hearing that it still worked with maple syrup. I think something to remember with rice Krispies is that they use high fructose corn syrup instead of honey or maple syrup so they are always going to turn out differently. You are probably right though with possibly beating for too long, as you beat the marshmallow it cools so if it is beaten for too long it definitely could create lumps.

          Reply
  2. Emily

    December 17, 2022 AT 2.54 PM

    I’d like to include these as a hot chocolate gift. Will they be OK out of the fridge for an extended period, like 6 hours?

    Reply
    1. Sarah Bell

      December 19, 2022 AT 6.38 AM

      Hi Emily, That’s a great question actually as I would normally just leave them in the fridge. I’m going to leave some out of the fridge today and test how they will go and then let you know.

      Reply
    2. Sarah Bell

      December 22, 2022 AT 6.55 AM

      Hi Emily, so I left the marshmallows out of the fridge for 6 hours and they still held there shape and were fluffy. I would say it would depend on the outside temperature, if it’s really hot and humid they probably wouldn’t hold up very well but on a cool day they would be fine.

      Reply
  3. Olivia

    July 4, 2023 AT 2.02 AM

    What size pan did you use? Would 9×13 work?

    Reply
  4. Olivia

    July 31, 2023 AT 11.15 AM

    Will these roast over fire?

    Reply
    1. Sarah Bell

      August 4, 2023 AT 4.48 PM

      I actually haven’t tried roasting these over the fire yet but I will update the post once I do.

      Reply
      1. Olivia

        August 13, 2023 AT 1.23 AM

        Thank you! I’m interested to hear back 🙂

        Reply
  5. Jenna

    October 10, 2023 AT 1.21 AM

    5 stars
    These are so easy and absolutely delicious! I saw another comment asking if these can be left at room temp to develop the “dry shell” that store bought marshmallows have so we can roast them over a fire. Can you answer that?
    also – how long do these last in fridge and/or at room temp?

    Reply
  6. Rina

    November 5, 2024 AT 7.52 AM

    I would love to make it. I have a bumper crop of blood orange. Can I use freshly squeezed blood orange juice instead if water?

    Reply
    1. Sarah Bell

      November 6, 2024 AT 9.10 AM

      I haven’t tried but I think that could work! Just make sure you strain the orange juice so that it is pulp free. I’d love to hear how they go!

      Reply
  7. Jen

    November 11, 2024 AT 3.20 AM

    5 stars
    For everyone asking about gifting these or using them over fire – I love this recipe and use it every few months. I cut them up and leave them on a cooling rack with a tea towel over them on the counter at room temp for about 5-7 days. They develop hard shell and I keep them sealed in an airtight container for at least a week (if they last that long!)

    Reply
  8. Lydia Cottingham

    January 4, 2025 AT 7.14 PM

    Hello, love this recipe! Any suggestions how I could make it lemon and honey for a cold-fighting power house? Thank you

    Reply
    1. Sarah Bell

      January 9, 2025 AT 1.47 PM

      Hi there, you could try replacing some of the water for lemon juice (strained). I’d love to hear how you go!

      Reply
  9. Elisabeth

    January 18, 2025 AT 6.59 AM

    Why does the honey mixture need to boil? Doesn’t this kill all the goodness in the raw honey? Could you just boil the water, then whisk in the honey quickly before adding to the gelatin?

    Reply
    1. Sarah Bell

      January 20, 2025 AT 7.31 AM

      In this recipe the honey needs to reach a certain temperature so that it is candied and will therefore cause the marshmallows to set. I don’t believe it would work if you just boiled the water unfortunately.

      Reply
  10. Faathima

    November 8, 2025 AT 9.25 PM

    I tried this today and its beyond amazing. Browned 2 tablespoons of butter and mixed with vanilla extract, then followed all steps and added that in last gradually when the marshmallow mixture was almost done. And added rice crispies last to make rice crispy treats

    Reply
    1. Sarah Bell

      November 10, 2025 AT 1.16 PM

      That sounds like some delicious additions!

      Reply

My debut cookbook–Our Nourishing Week

My debut cookbook Our Nourishing Week is a collection of 85+ easy and nutritious recipes for the whole family. It includes 6 weeks of meal plans, complete with shopping lists – simplifying your family meals for an easy, healthy week – every week.

order now

Hi, I’m Sarah!

I’m a nutritionist turned healthy recipe developer who is all about creating delicious food designed to nourish. I love using wholefood ingredients and have a strong focus on gluten free, dairy free and refined sugar free recipes.

MORE ABOUT ME >

Hey there, I’m Sarah!

I’m a Bachelor qualified Nutritionist turned healthy recipe developer and the creator of Our Nourishing Table.

I love creating easy to make, nutrient-filled recipes from quick dinner recipes and make-ahead breakfasts to healthy treats and luscious desserts (with a healthy spin of course).

more about me

Hungry for more?

Please enable JavaScript in your browser to complete this form.
Loading

SEARCH RECIPES

  • Recipe Index
  • Breakfast
  • Mains
  • Snacks
  • Drinks
  • Healthy Treats

Discover

  • Cookbook
  • About Sarah
  • Work with me

follow

The Boring Bits

  • Privacy Policy
  • Terms & Conditions
back to top
Copyright © 2025 Our Nourishing Table.

Design by White With One. Coding by Made to Thrive.

Rate This Recipe

Your vote:


A rating is required
A name is required
An email is required

Recipe Ratings without Comment

Something went wrong. Please try again.