
These delicious no bake energy bars are made with wholesome, healthy ingredients like nuts, seeds, coconut and almond butter. Loaded with healthy fats, complex carbohydrates and protein, my homemade energy bars will keep you feeling full for longer, giving you sustained energy and more stable blood sugar levels.
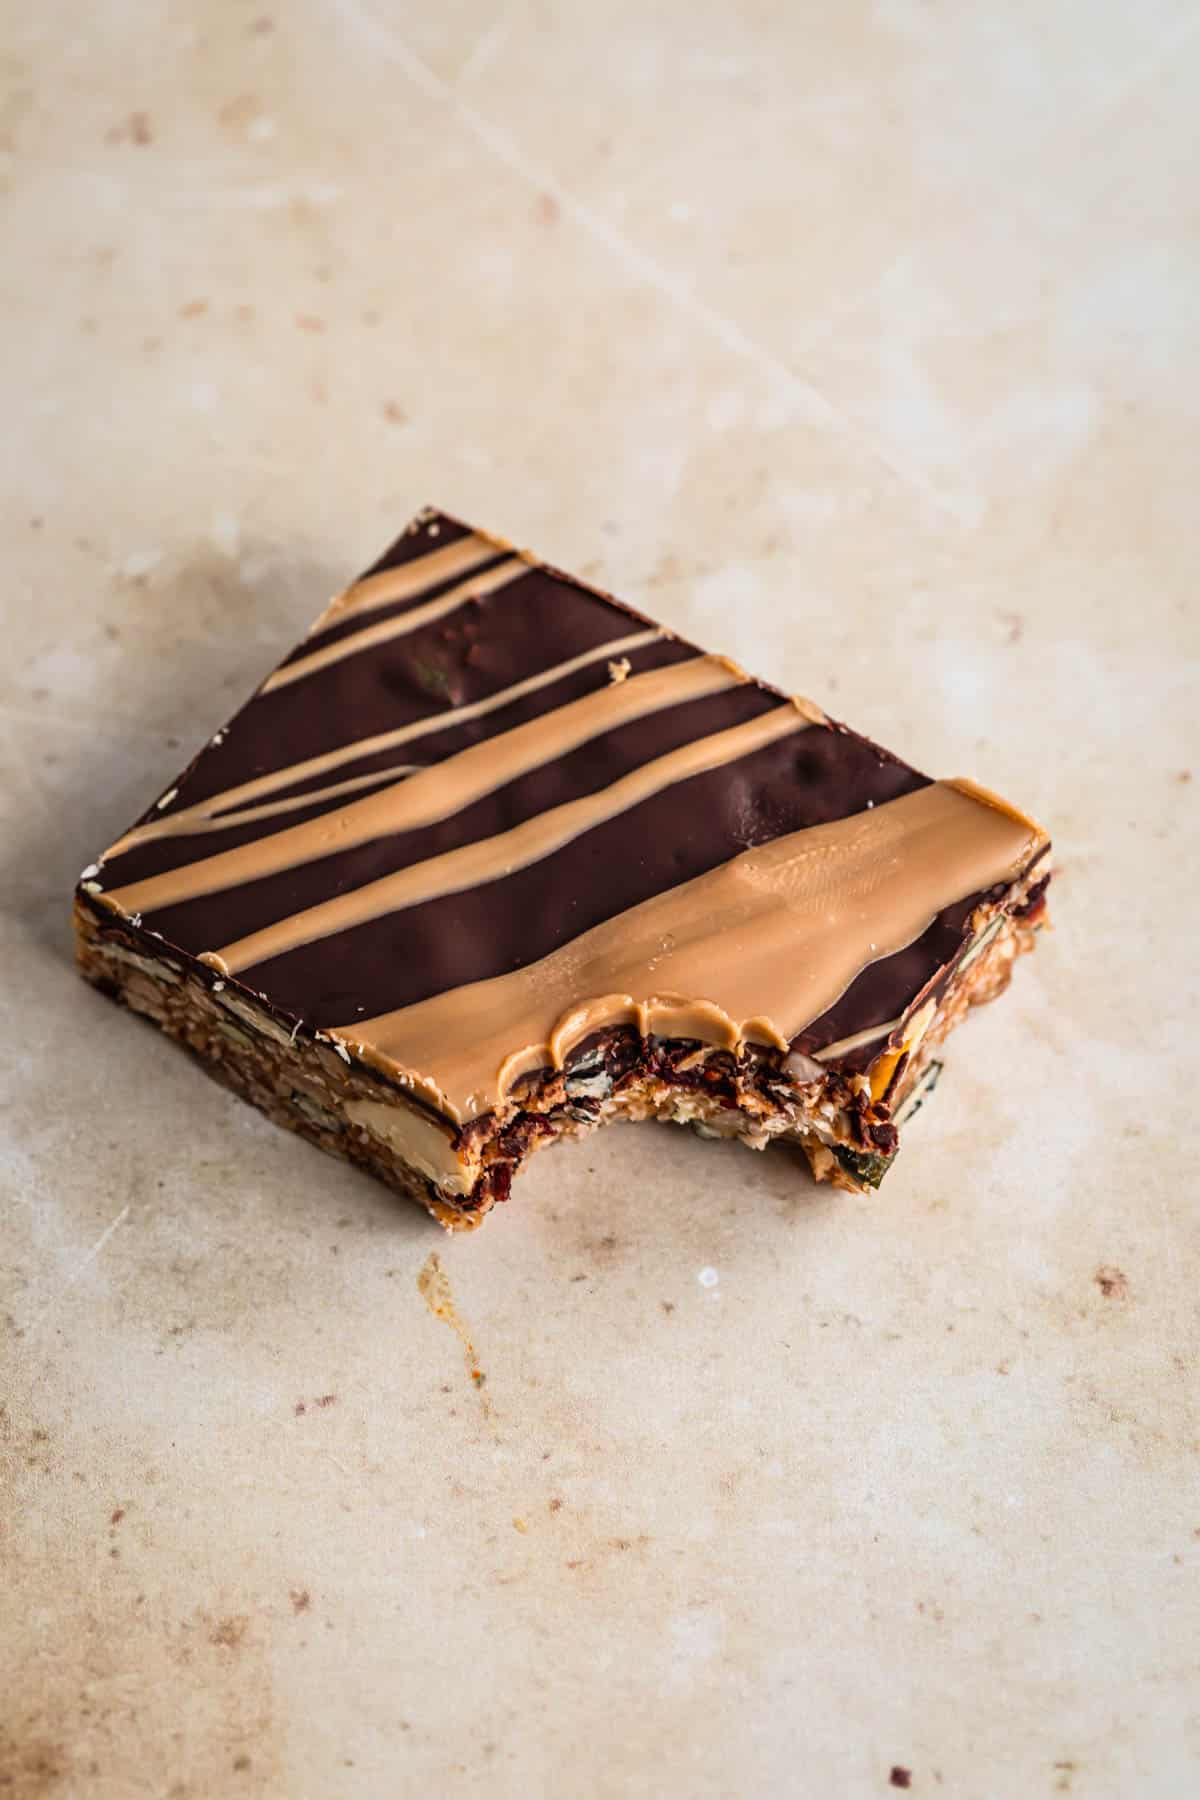
Covered in melted dark chocolate, these healthy energy bars are so delicious and just sweet enough.
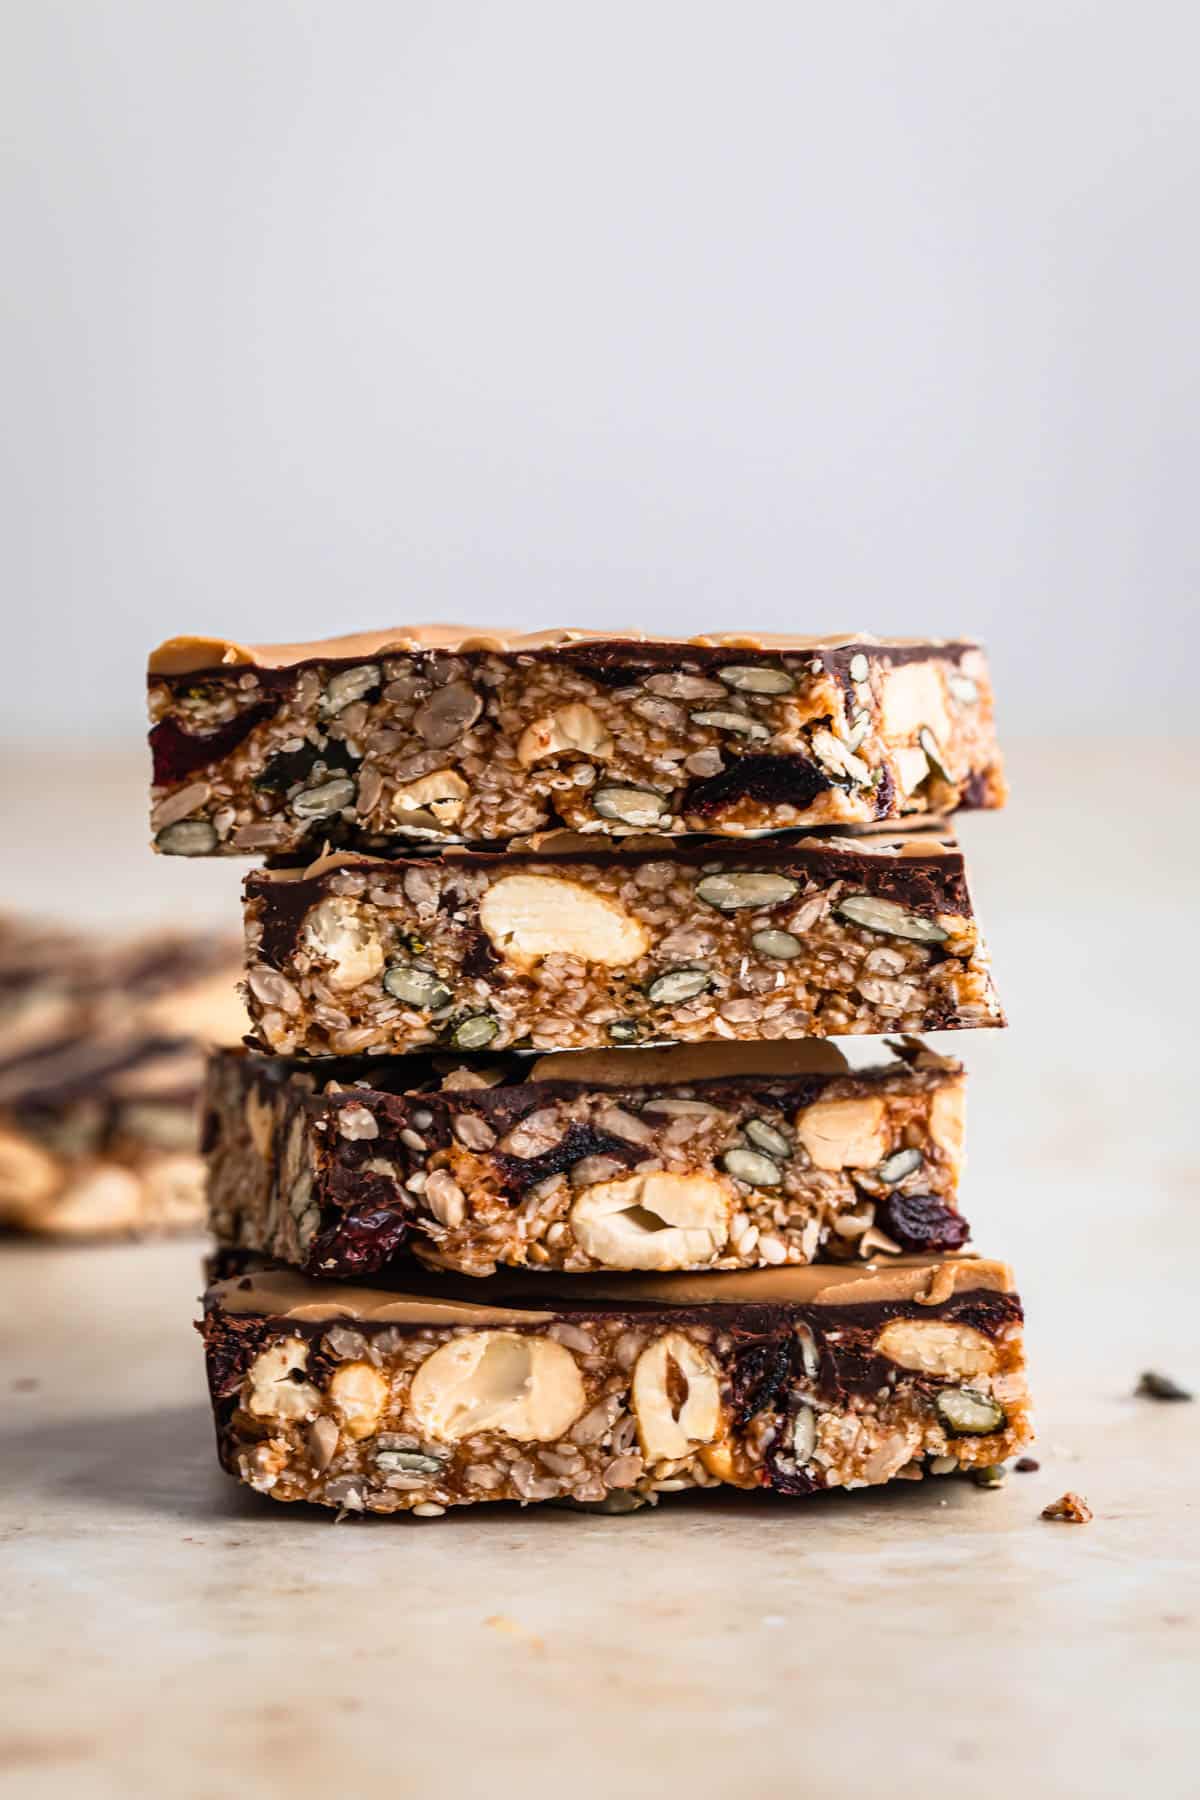
This nut bar recipe is chewy, sweet, nutty and filled with nutrients. These bars make for a seriously delicious snack and help to get you through that afternoon slump. If energy balls are more you speed than you might like to try my Peanut Butter Chocolate Bliss Balls or my Nut Free Chocolate Bliss Balls.
Things to Love About These No Bake Energy Bars
- Grain free – these bars are completely grain free, paleo and gluten free.
- No food processor or high-powered blender required – to make these bars you will need a large bowl and a saucepan, no expensive equipment needed.
- Plant based protein – these bars contain approximately 7 grams of plant based protein per serve.
- The perfect snack – filled with healthy fats, protein, fibre, calcium and iron, these no bake bars make for the perfect healthy sweet treat, afternoon snack or quick breakfast on the go.
- All natural ingredients – made using wholefood natural ingredients and nothing artificial, unlike a lot of store-bought protein bars. You can see all of the nutrition facts in the recipe card at the bottom of this post.
Ingredients Notes & Substitutions
This healthy snack recipe is made using simple, wholesome ingredients. All of these basic pantry ingredients can be easily sourced from most major grocery stores. See below for any ingredient notes and possible substitutions. You can find the ingredient quantities in the recipe card at the bottom of this post.
- dry roasted cashews – cashews can be swapped for dry roasted almonds or peanuts.
- pepitas – pepitas are a great source of calcium, zinc, magnesium and iron. Pepitas are also known as pumpkin seeds.
- sunflower seeds – sunflower seeds are a great source of B vitamins, choline, Vitamin E and minerals.
- sesame seeds – can be swapped for hemp seeds or a combination of hemp seeds and chia seeds.
- desiccated coconut – shredded coconut can be used instead of desiccated.
- dried cranberries – you can swap the dried cranberries for other dried fruits like dried sour cherries, sultanas, diced medjool dates or diced dried apricots. Or leave the fruit out if following a low fructose diet.
- brown rice syrup – also known as brown rice malt syrup. Brown rice malt syrup is fructose free, so it is suitable for those on a fructose free or low fructose diet.
- almond butter – almond butter can be swapped for cashew butter, sunflower seed butter, creamy peanut butter, macadamia nut butter or tahini.
- cold pressed extra virgin coconut oil –
- dark chocolate – either use your favourite bar of dark chocolate or use the same weight in dark chocolate chips.
- salted caramel chocolate – I’ve used a vegan salted caramel chocolate to drizzle over the top. You can also use a vegan white chocolate or leave out altogether.

How to Make No Bake Energy Bars
Making these no bake energy bites is so easy, follow my detailed instructions below for best results.
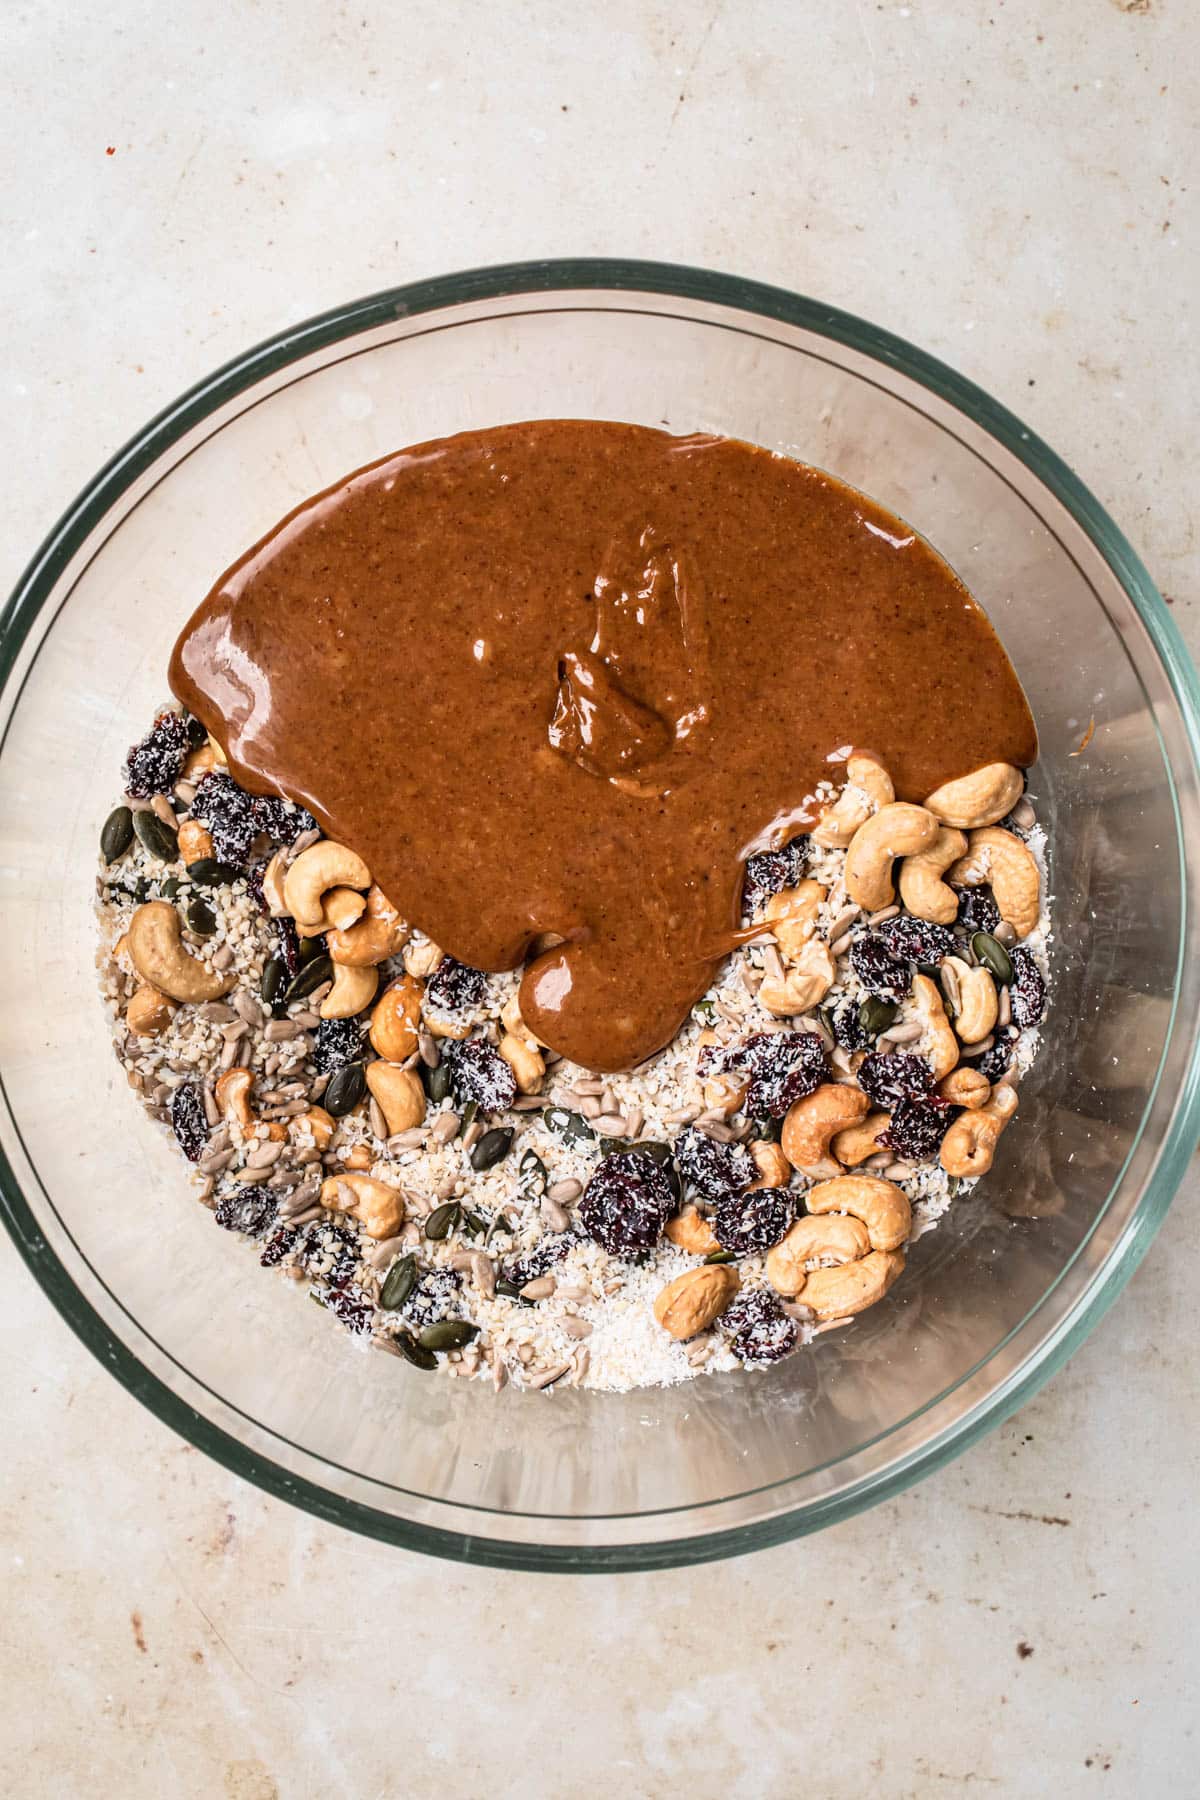
First, mix together the dry ingredients. Add the pepitas, sunflower seeds, cashews, sesame seeds, dried cranberries and coconut to a large or medium bowl. Stir to combine and set aside.
Would you like to save this?

Next, line a baking sheet or tin with parchment paper and set aside.
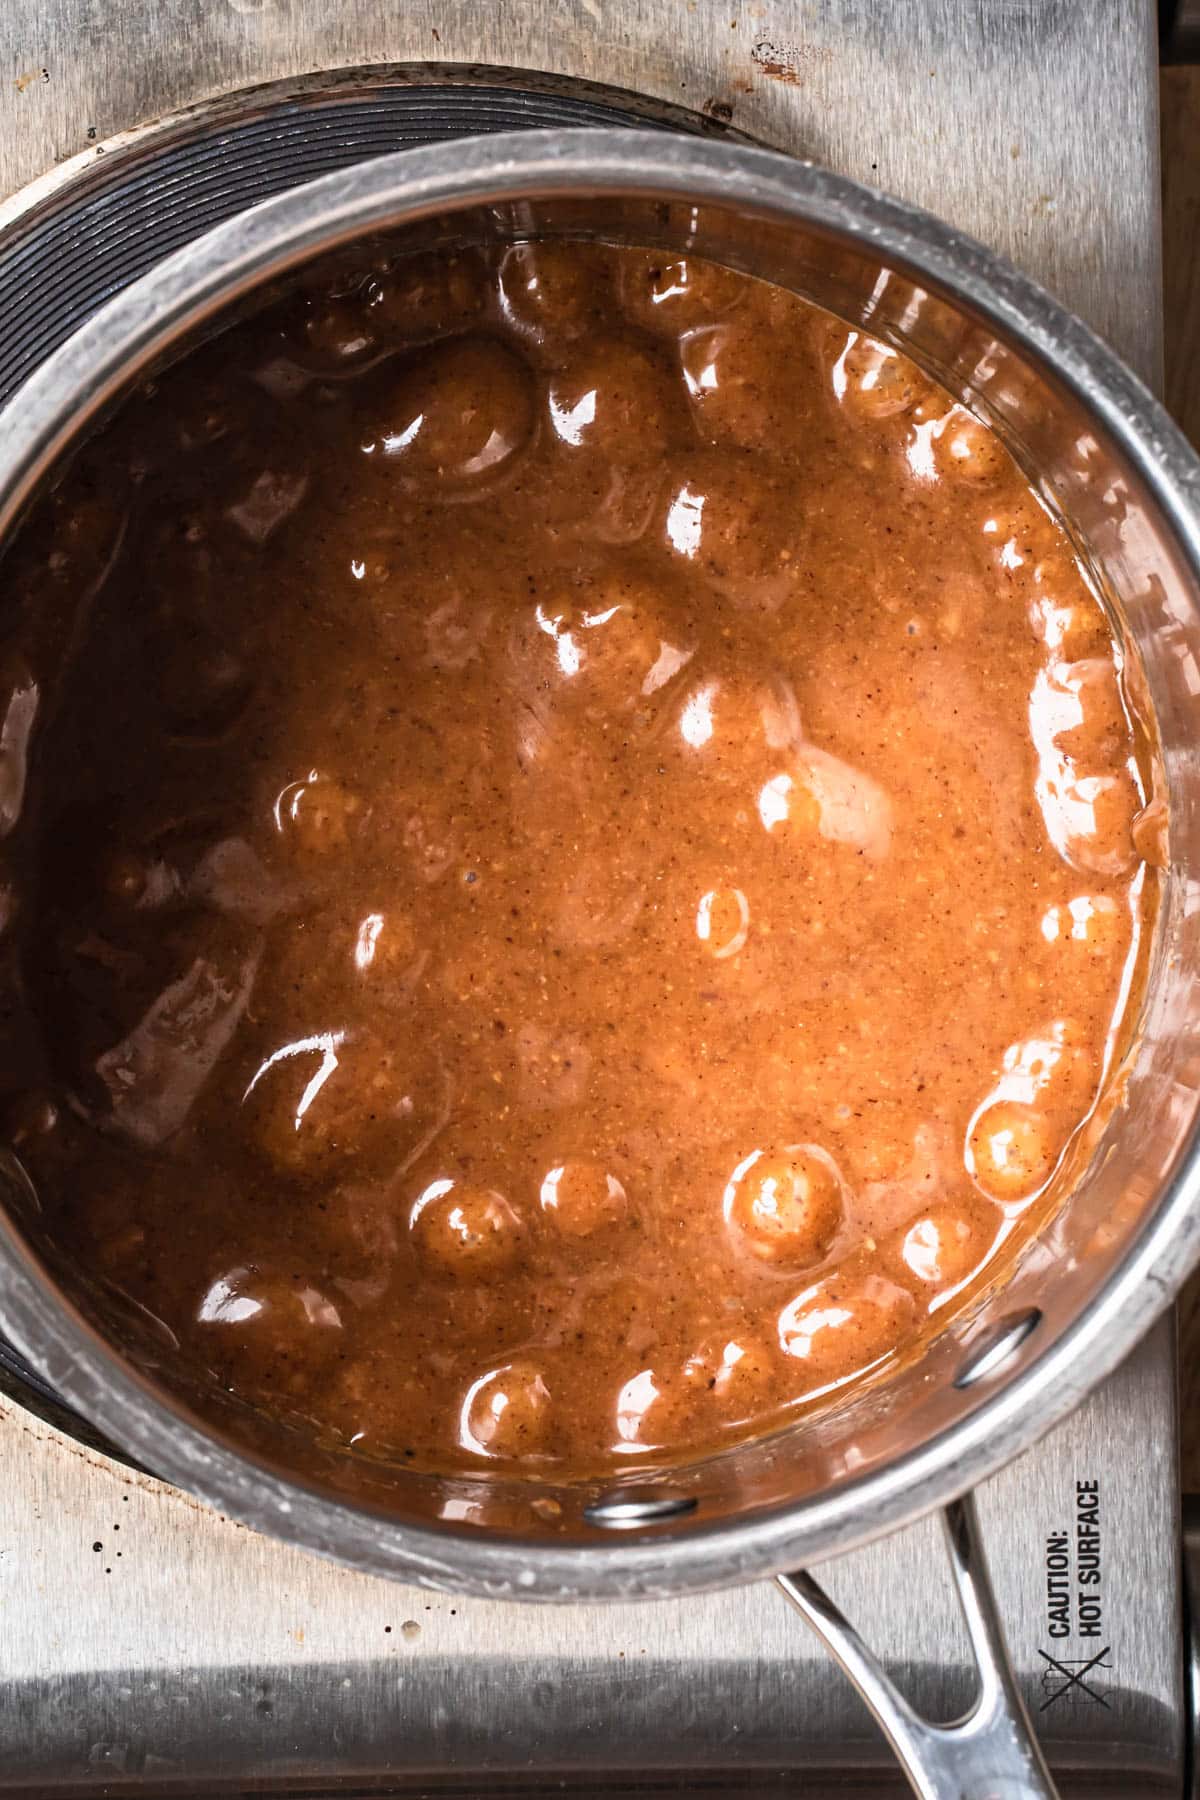
Make the nut butter mixture by adding the almond butter, coconut oil and brown rice syrup to a saucepan over a medium heat. Whisk to combine and remove the mixture from the heat once it starts bubbling. Keep a close eye on the mixture so that it doesn’t burn or stick to the bottom of the pan.
Pour the nut butter mixture into the dry ingredients and stir through to combine. The nut butter mixture will begin to harden as it cools so you need to work quickly. You will also really need to push the nut butter into the dry mixture with the back of a spoon, it will be very thick and sticky!

Tip the energy bar mixture into the parchment paper lined baking tray and use a metal egg flip to press mixture down evenly and firmly across the base of the tray. Set the tray aside while you melt the chocolate.
To melt the chocolate, break the dark chocolate up and place into a medium heat-proof bowl atop a saucepan of water. Bring the saucepan to a medium heat, stirring the chocolate as it melts. Once completely melted, remove from the heat.
Carefully pour the melted chocolate over the top of the slice and spread across the top of the slice evenly with a spatula. Place the slice in the fridge to set.


Repeat this process with the salted caramel chocolate if using and drizzle over the top of the slice decoratively, once the dark chocolate has set. Once the chocolate has set, slice and enjoy!

Storage
Store the sliced bars in an airtight container in the fridge for up to two weeks. These bars can also be frozen – defrost an individual bar on the bench top for around ten minutes before eating.
No Bake Energy Bars
Equipment
- Saucepan
- Measuring Cups & Spoons
- Slice tin
- Baking Paper
- Whisk
- Mixing Spoon
Ingredients
- 1/3 cup brown rice malt syrup
- 2 tablespoons coconut oil, extra virgin
- 1/4 cup almond butter
- 1/2 cup desiccated coconut
- 1/2 cup dried cranberries
- 1/4 cup pepitas
- 1/2 cup sunflower seeds
- 1/2 cup sesame seeds
- 1 cup dry roasted cashews
- 90 grams dark chocolate
- 50 grams vegan salted caramel chocolate, optional
Instructions
- Line a slice tin with baking paper and set aside.
- In a large mixing bowl add the dessicated coconut, cranberries, pepitas, sunflower seeds, sesame seeds and cashews. Mix together and set aside.1/2 cup desiccated coconut, 1/2 cup dried cranberries, 1/2 cup sunflower seeds, 1/2 cup sesame seeds, 1 cup dry roasted cashews, 1/4 cup pepitas
- Bring a small saucepan to a low heat. Add in coconut oil and allow to melt. Once melted add the brown rice malt syrup and almond butter and whisk over low heat until the mixture starts to bubble. Once bubbling, remove from the heat.1/3 cup brown rice malt syrup, 2 tablespoons coconut oil extra virgin, 1/4 cup almond butter
- Pour the almond mixture into the dry mix and stir/press together with a wooden spoon to combine.
- Once well combined, press the mixture into the slice tin. Spread out with the back of a spoon and then use an egg flip to press down firmly.
- Break up the dark chocolate and add to a glass bowl atop a small saucpean of water on a medium heat. Stir the chocolate while it is melting to prevent from overheating.90 grams dark chocolate
- Pour the melted dark chocolate over the top of the pressed down bar mixture. Use the back of a spoon to spread out and then holding onto the sides of the baking tin, tip the tin from side to side to evenly spread the chocolate over the bar.
- Place the slice into the refrigerator or freezer and allow to set for approximately one hour. The bars will set more quickly in the freezer.
- Once set, remove bar from the fridge or freezer and slice up into approximately 12 bars or 16 bite sized bars.
Optional
- Melt vegan salted caramel chocolate in a glass bowl atop a saucepan of water on a medium heat and drizzle over the top of the slice once set.50 grams vegan salted caramel chocolate optional
Notes
Storage
Store bars in a sealed airtight container in the fridge for up to two weeks.Nutrition
Did you make this recipe? Give this recipe a star rating and comment below.
Follow Our Nourishing Table on Instagram, Facebook and Pinterest for more healthy eating inspiration.


Like this recipe? Leave a comment!