
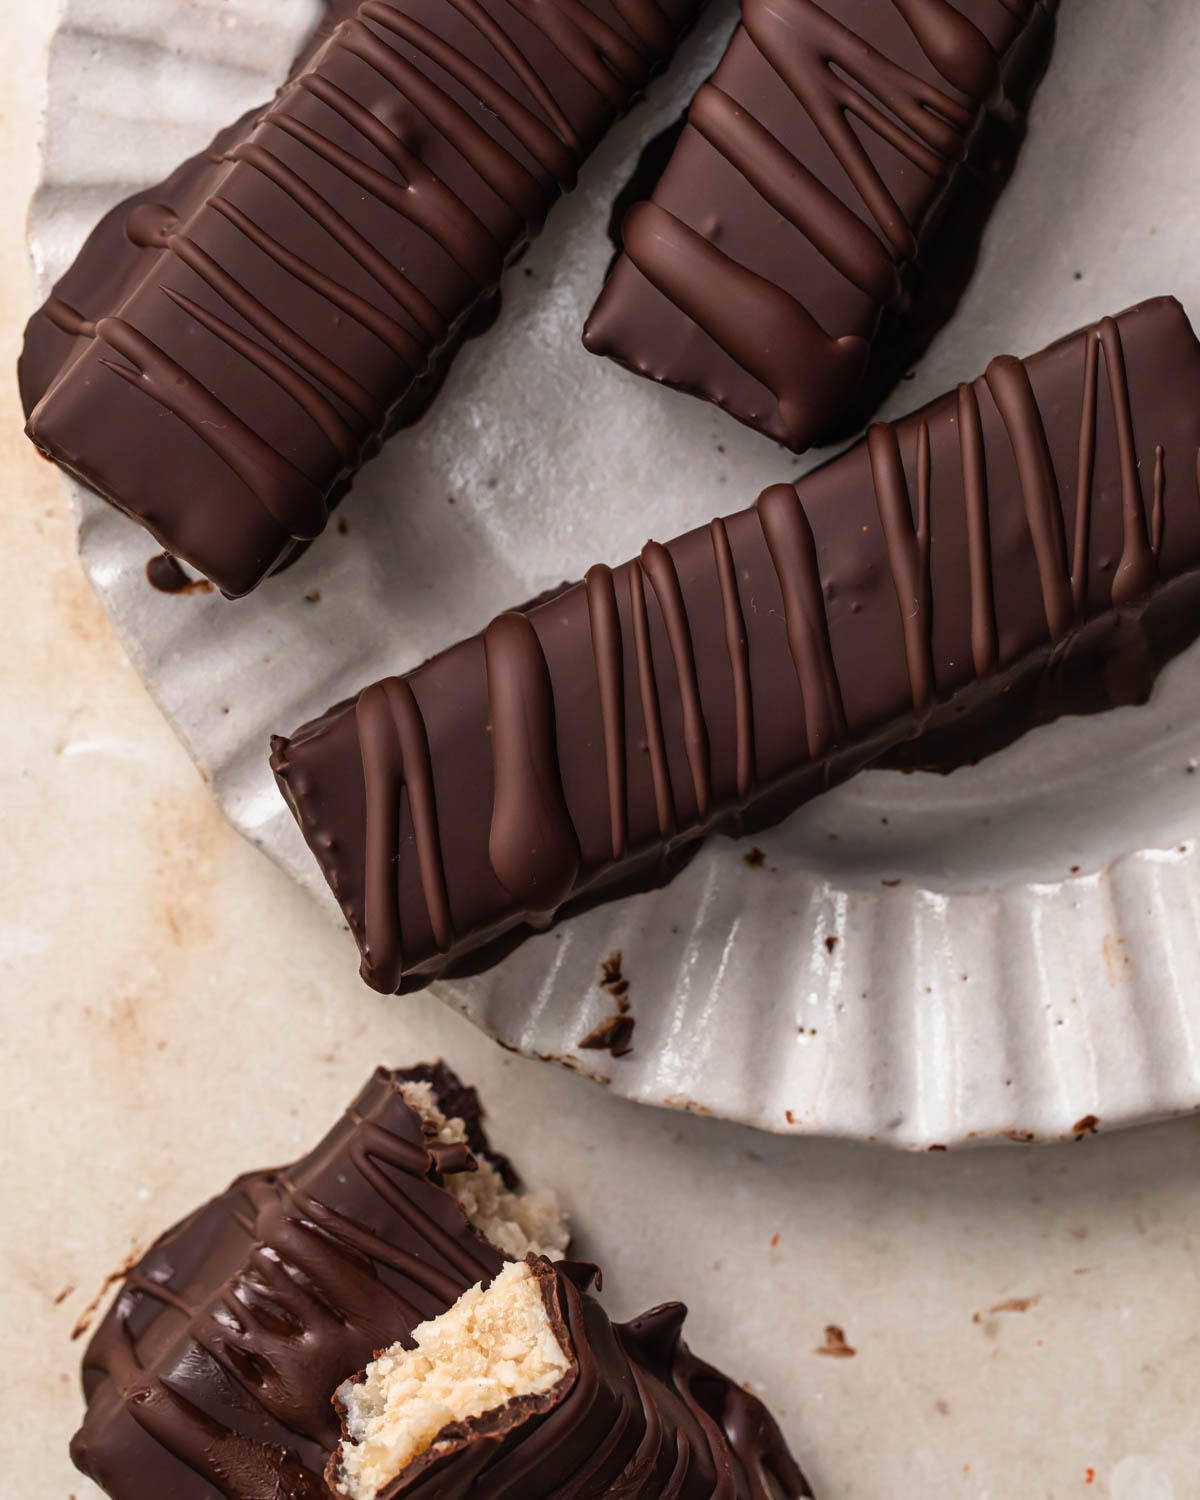
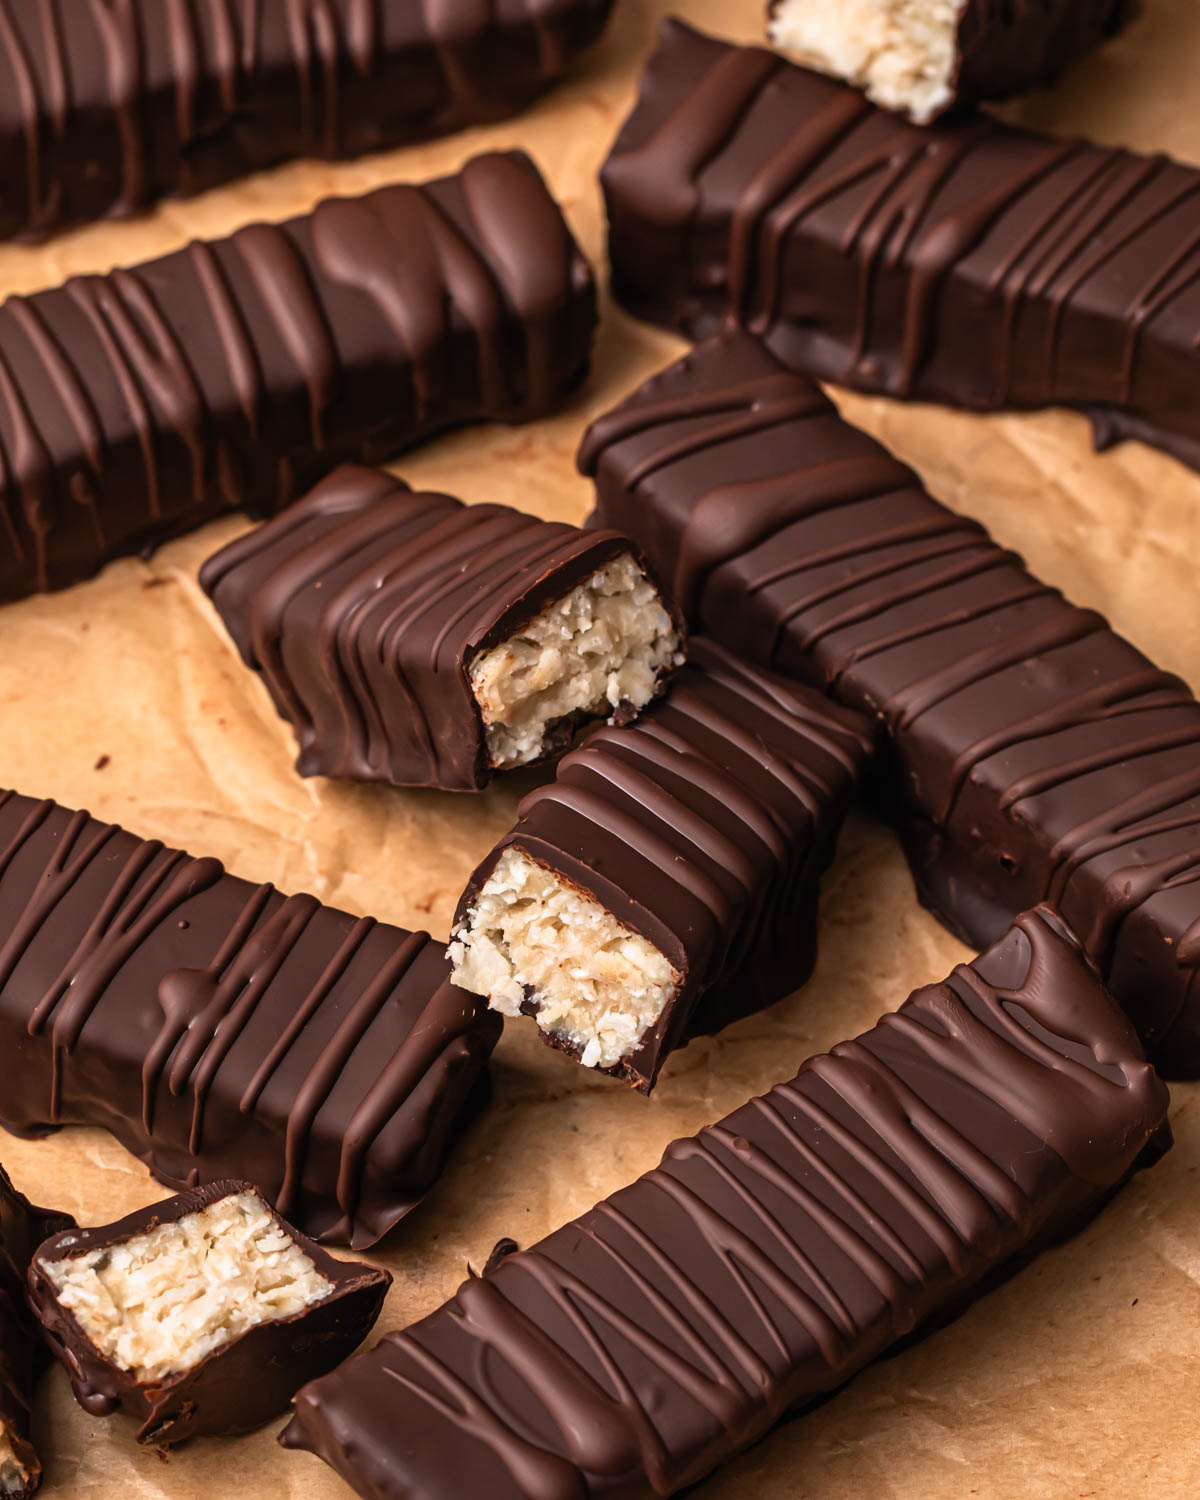
Bounty bars were by far my favourite chocolate bar when I was a kid. If you love Bounty bars too then you are going to absolutely love this homemade version. These Healthy Bounty Bars have that same delicious coconut filling coated in a layer of dark chocolate. But they’re made with wholefood ingredients and without all of the added sugar. They taste just as indulgent as the original (even better in my opinion) and you can feel genuinely good about eating them.
It’s not often that I create something that wins over all three of my kids but my whole family absolutely loved these. They disappeared from the fridge very quickly! I love that they’re packed with nourishing ingredients rather than the refined sugars and additives you’d find in a store-bought bar. As a mum of three and a nutritionist, finding treats that everyone loves and that I’m happy for them to eat is honestly the dream, and these tick every box. Plus I was able to sneak some collagen powder in there to boost the protein content so they will keep you full for longer.
If you’re looking for more healthy desserts then you should try these amazing recipes – Almond Butter Strawberry Date Bark, Pecan Pie Stuffed Dates or these Double Chocolate Protein Balls.
Everything you will need to make Healthy Homemade Bounty Bars
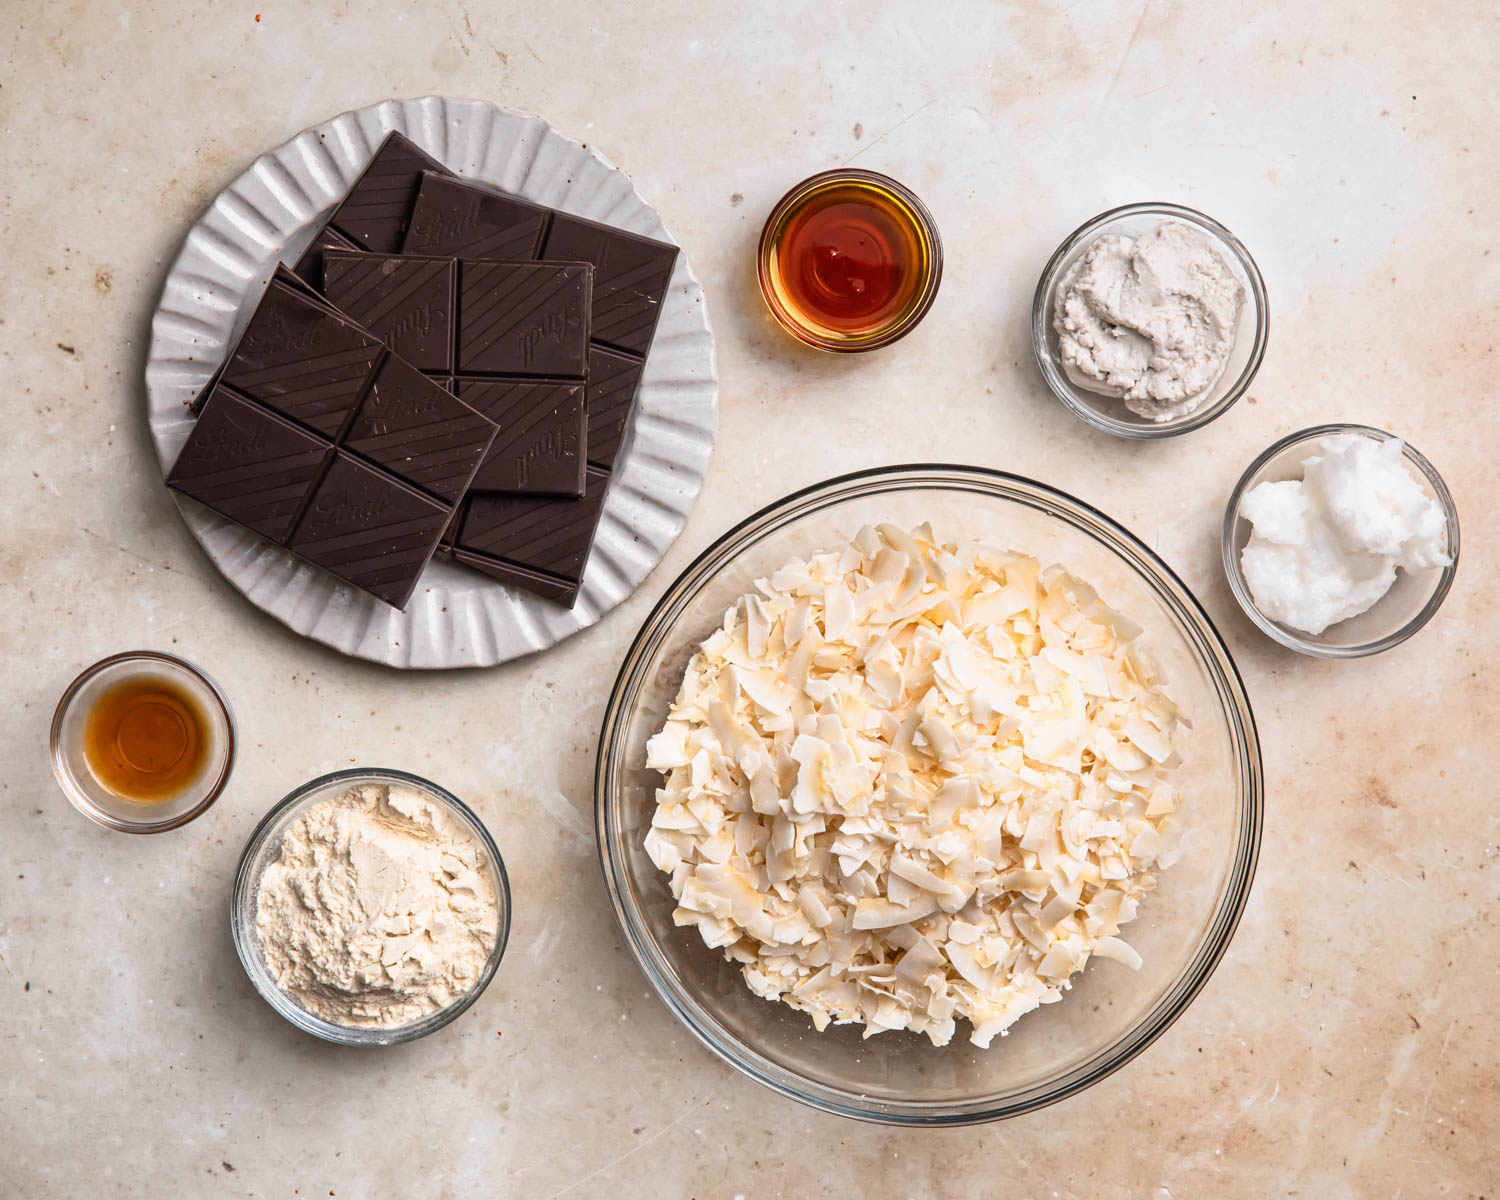
You only need 7 ingredients to make these bounty bars and they come together in no time. I was able to find most of the wholesome ingredients for these bounty bars from my local grocery store. Everything you need is listed below along with ingredient notes and possible substitutions. Find the ingredient quantities in the recipe card at the bottom of this post.
Dry Ingredients
- coconut flakes – coconut flakes are the base of the filling and give these bars their signature Bounty bar flavour and texture. Make sure to use unsweetened coconut flakes and try to buy organic if you can. Coconut flakes and desiccated coconut usually have preservatives in them, which I try to avoid. Desiccated coconut will also work but the texture will be slightly different. Coconut is a great source of healthy fats, fibre and manganese.
- Chief Nutrition Creamy Vanilla Collagen Powder – this adds a lovely vanilla flavour and a boost of collagen protein which is great for gut health, skin, hair and joints. It blends seamlessly into the coconut filling and you won’t taste it at all. The creamy vanilla collagen powder is sweetened with monk fruit and therefore adds to the overall sweetness. If you don’t have collagen powder, you could leave it out, the bars will still work, I would recommending adding an extra tablespoon of maple syrup for sweetness though.
- dark chocolate – I love using a good quality dark chocolate (70% cocoa or higher) for the best flavour and antioxidant benefit. You can also use dark chocolate chips. Check the ingredients if you want to keep these dairy free, as some dark chocolates contain milk solids. Personally I prefer dark chocolate over milk chocolate as it is usually lower sugar and dairy free, but if you aren’t a dark chocolate fan then go for the milk chocolate.
Wet Ingredients
- vanilla extract – vanilla adds a beautiful warmth and sweetness that pairs perfectly with the coconut. Use a good quality pure vanilla extract for the best flavour.
- coconut milk – just 2 tablespoons of coconut milk helps bind the filling together. Coconut cream would work well if that’s what you have on hand.
- coconut oil – coconut oil helps the filling hold together and keep their shape once cold.
- pure maple syrup – maple syrup is my favourite natural sweetener and adds just the right amount of sweetness without overpowering the coconut. Make sure to use pure maple syrup, not maple-flavoured syrup. You could also try swapping for other liquid sweeteners like honey, brown rice syrup or agave in a pinch.
How to Make Healthy Bounty Bars
These bars are no-bake and come together quickly – just blitz, press, freeze, dip and set. The hands-on time is only about 25 minutes, then the fridge and freezer does the rest, with a total time of about 1 and a half hours. See my tips below to help you get the best results. Find the instructions in the recipe card at the bottom of this post.
Prepare your tin and tray
Line a loaf tin (this is for pressing the coconut mixture into) and a baking sheet (this is for placing the bars onto once dipped in chocolate) with parchment paper before moving onto the next steps.
Blend well
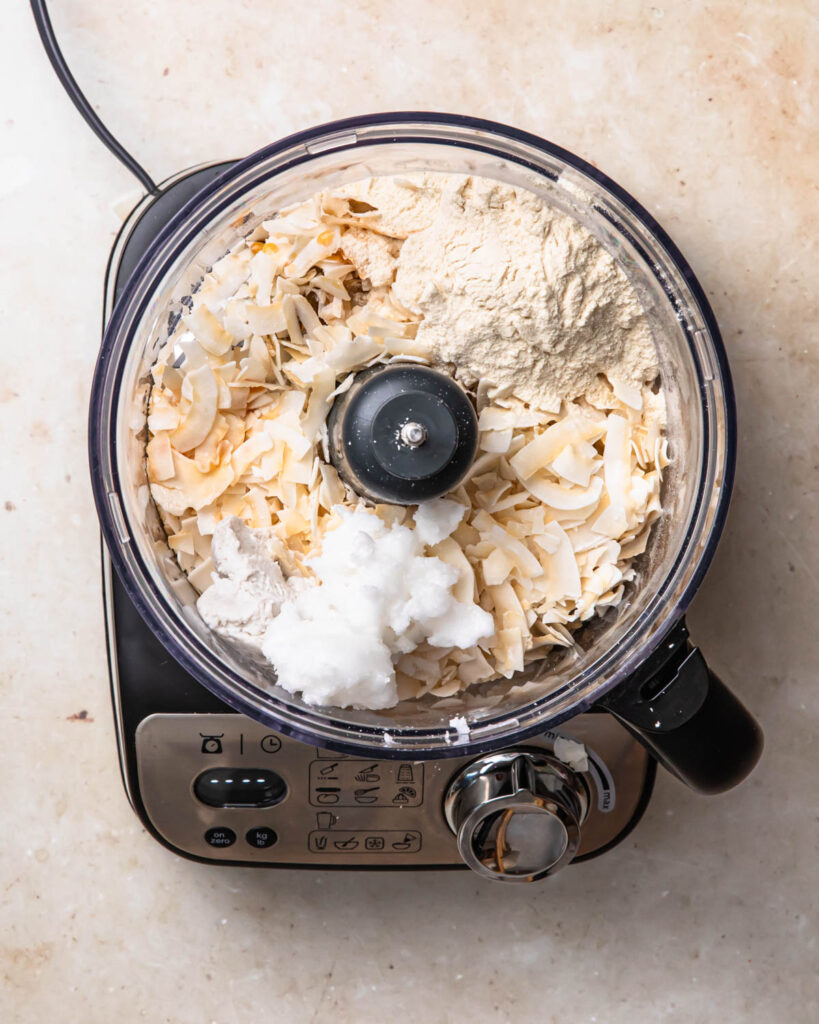
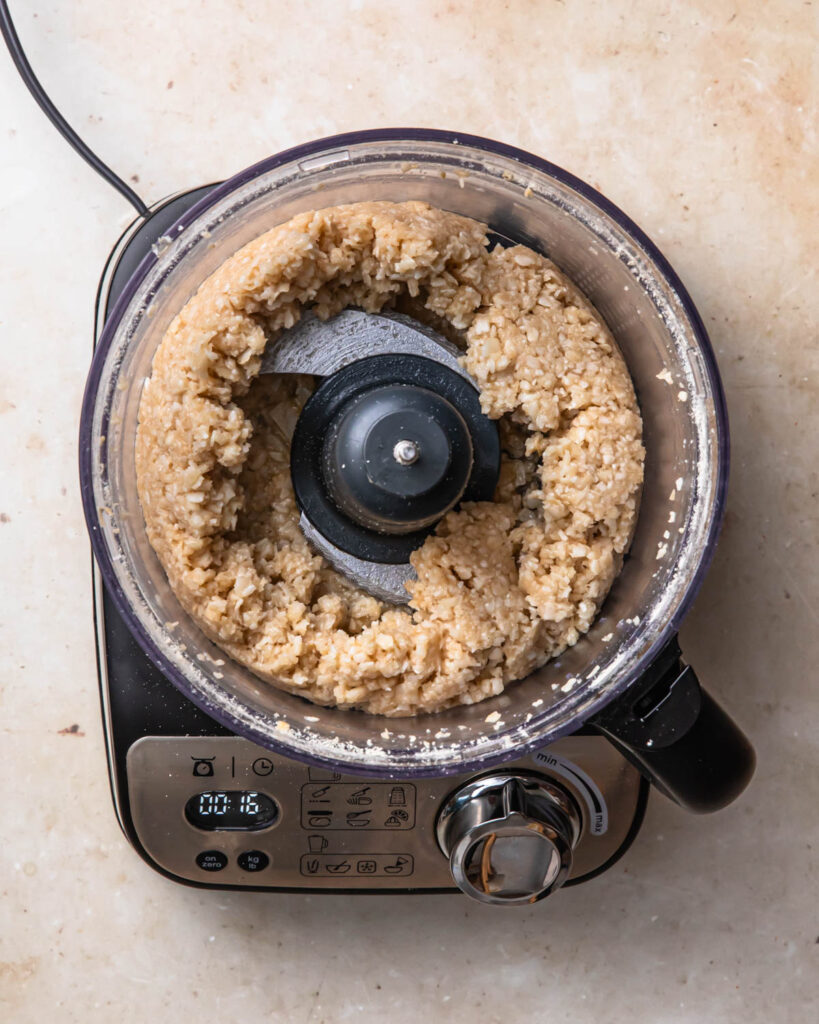
Blend the filling ingredients really well until they stick and clump together. I found a food processor works best but if you are using a blender you will just have to scrape down the sides.
Would you like to save this?
Press the mixture down firmly
Once you tip the mixture into the loaf tin, spread it out with the back of a spoon or spatula. Then press it down firmly before you freeze it so that the bars hold together well.
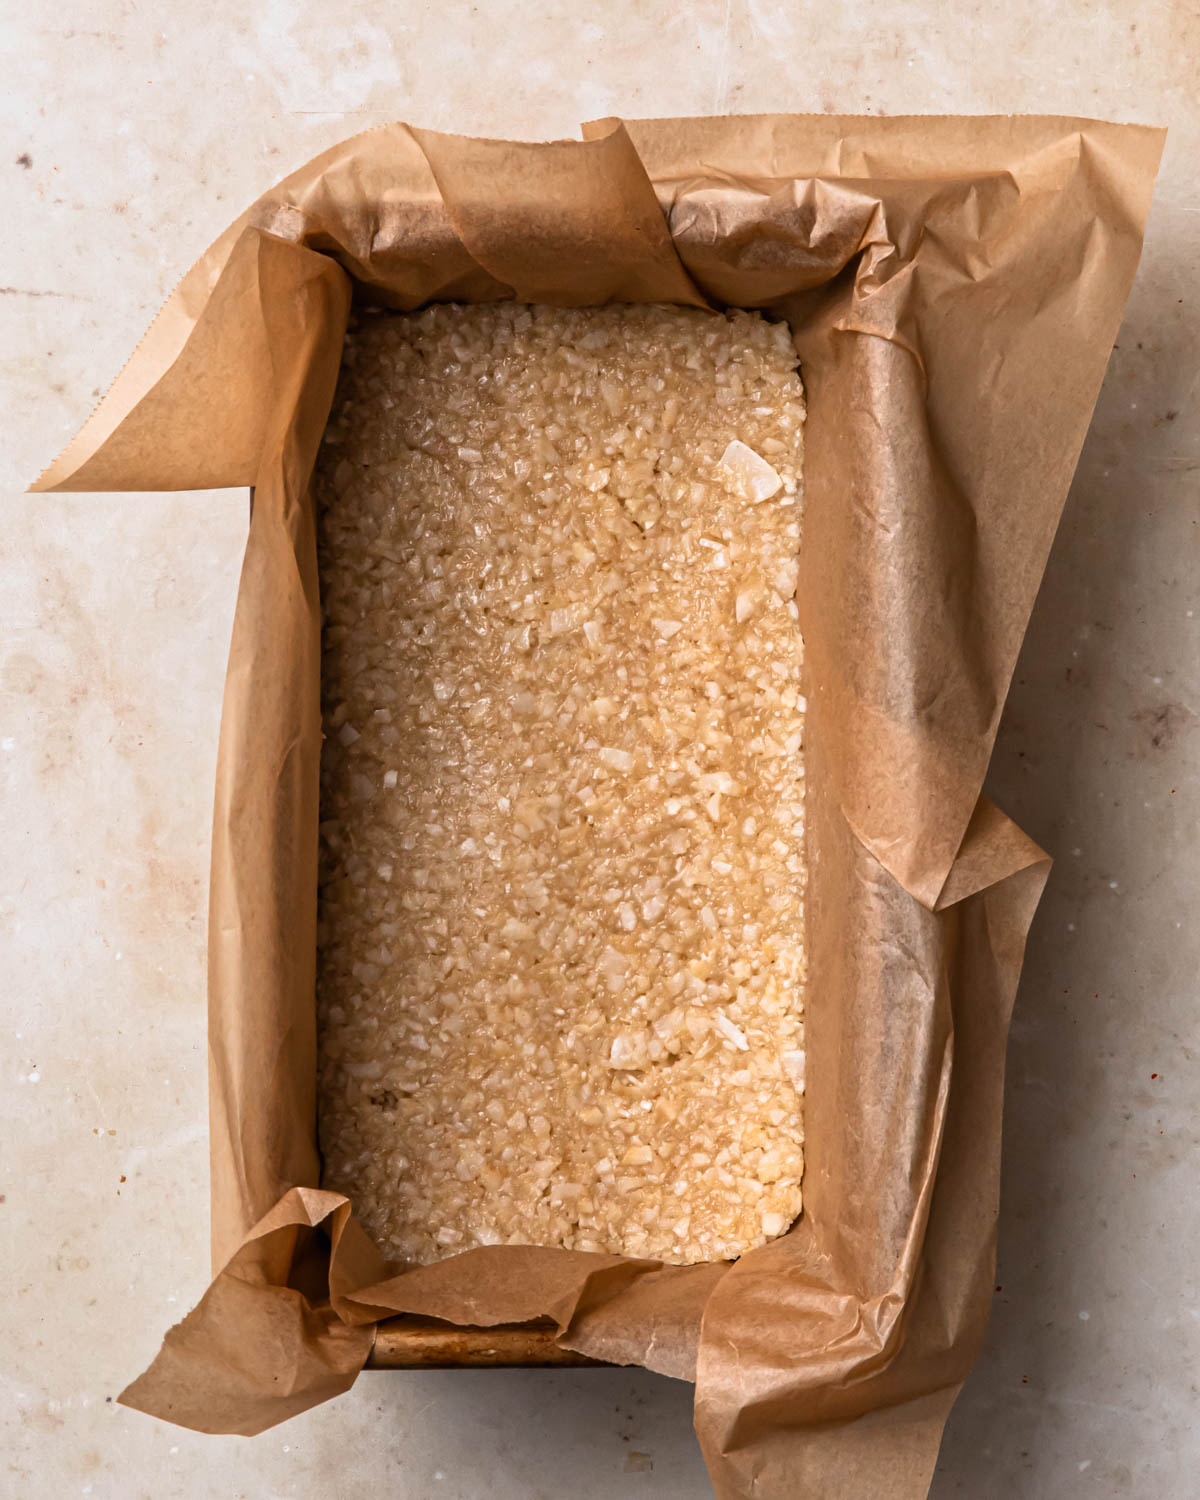
Freeze
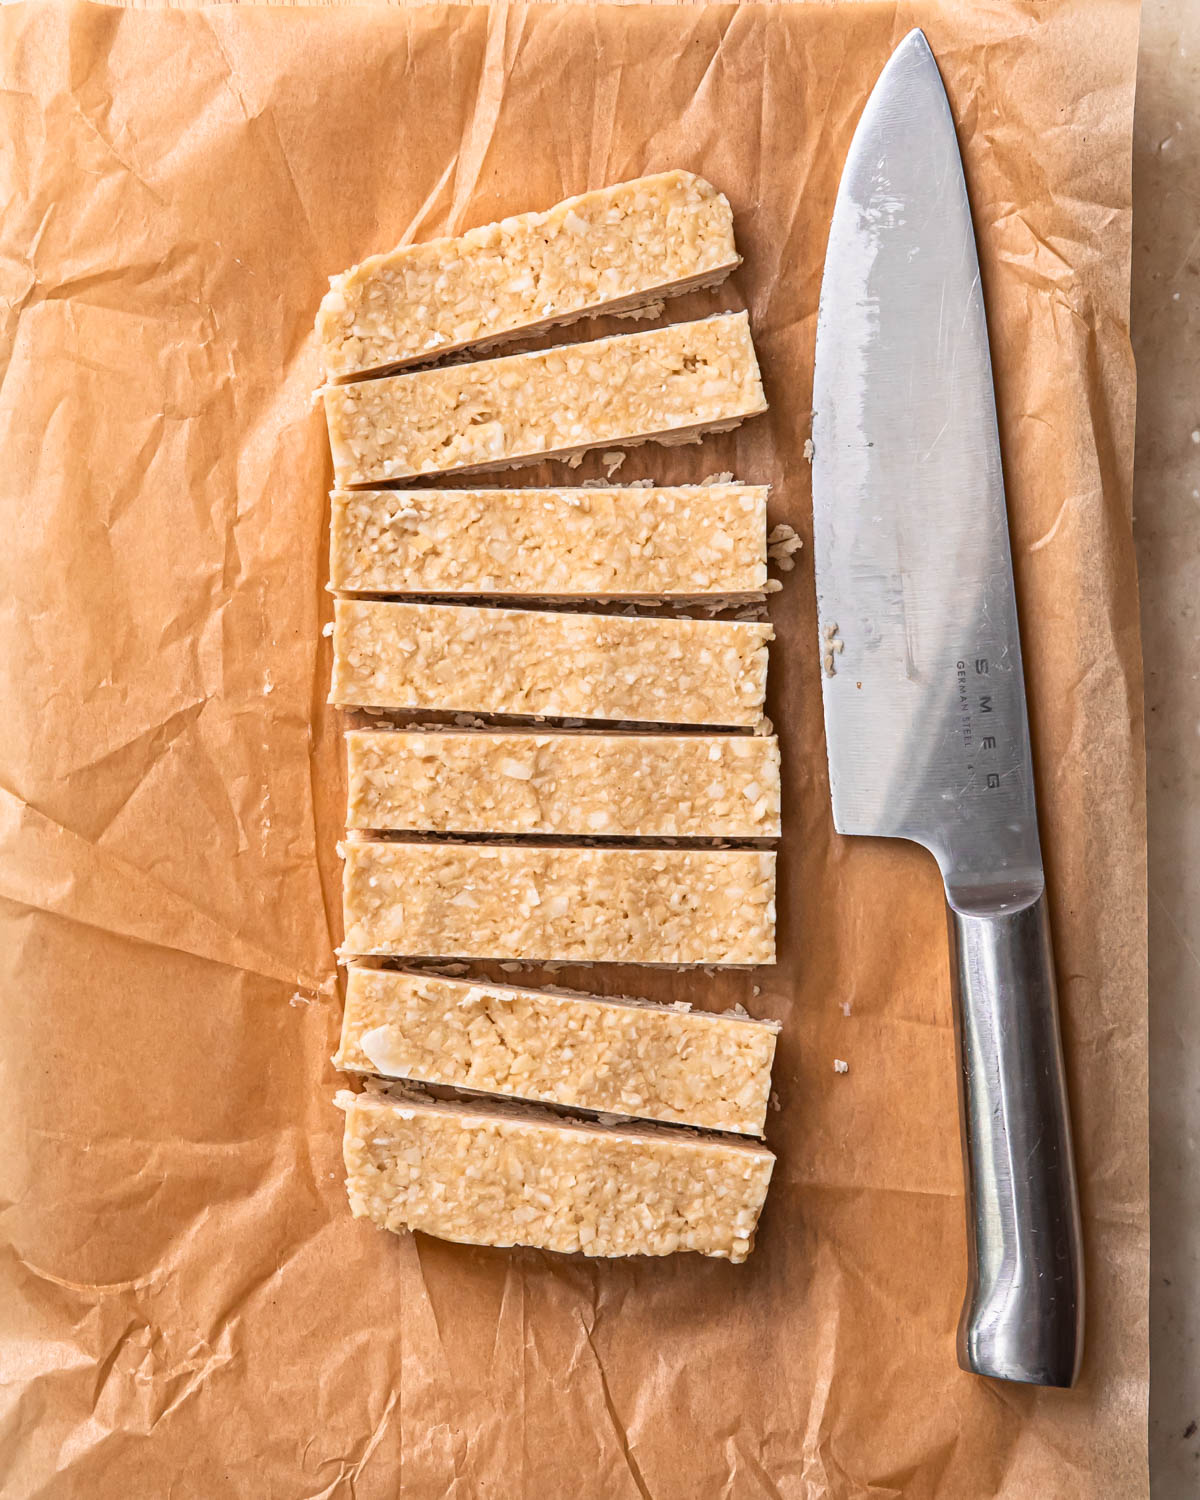
Freeze the mixture for at least one hour so that they are really firm when you go to slice them. This helps them to slice into neat bars.
Use a sharp knife to cut
A sharp, non-serrated knife will give you the cleanest cuts.
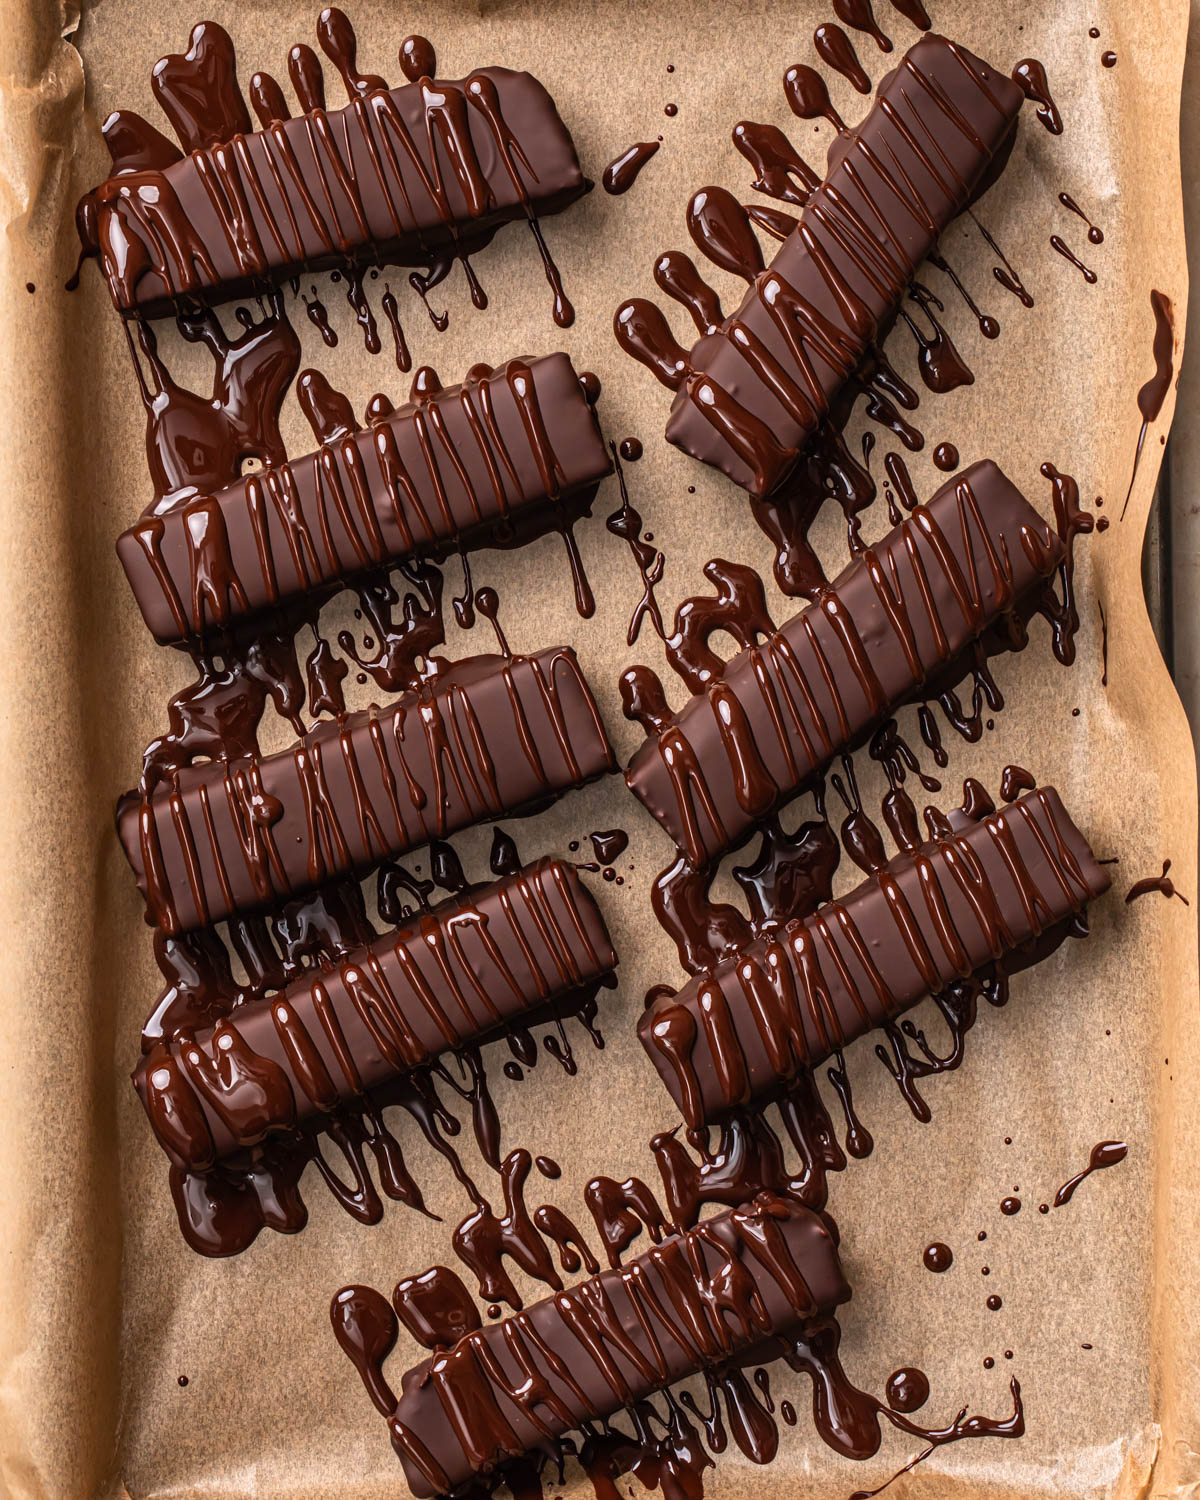
Melting the chocolate
Melt the chocolate before taking the bars out of the freezer and slicing. Once the chocolate is melted, I found it easiest to hold one bar on a fork. Dip the bottom of the bar in the chocolate, lift up the fork and hover the bar over the chocolate while you spoon melted chocolate over the top of the bar to coat completely.
The Drizzle
You might need to warm the chocolate up again for the drizzle or add a small amount of coconut oil (about a teaspoon) to thin it out a bit.
Storage
Once the chocolate is fully set, transfer the healthy bounty bars to an airtight container and store in the fridge for up to 4 days or in the freezer for up to 3 months.
Healthy Bounty Bars
Equipment
- Food Processor
- Loaf Tin
- Sharp knife
- Chopping Board
- Saucepan
- Baking Tray
Ingredients
- 200 grams coconut flakes, 3 cups
- 1 teaspoon vanilla extract
- 2 tablespoons coconut milk
- 2 tablespoons coconut oil
- 1 tablespoon pure maple syrup
- 1/3 cup Chief Nutrition Creamy Vanilla Collagen Powder
- 200 grams dark chocolate
Instructions
- Line a loaf tin with baking paper and set aside. Line a baking tray with baking paper and set aside.
- Add the coconut flakes, vanilla extract, coconut milk, coconut oil, maple syrup and collagen powder to a food processor. Process on high until the mixture is well combined.
- Tip the coconut mixture out into the lined loaf tin. Using the back of a spoon or a spatula to spread the coconut mixture out into an even layer across the base of the loaf tin. Push down firmly to compress the coconut layer. Place into the freezer to set for one hour.
- Place a heat proof bowl atop a saucepan of water. Place the saucepan onto the stovetop and bring to a medium-high heat. Break up the chocolate and add to the bowl. Stir frequently as the chocolate melts. Once the chocolate is completely melted, turn off the heat.
- Remove the tin from the freezer and remove the frozen filling from the tin. Using a sharp knife cut the frozen filling into 8 bars. Place one bar onto a fork and dip the bottom of the bar into the chocolate. Lift up the bar and use a spoon to drizzle melted chocolate over the bar until it is completely coated. Hover the chocolate coated bar above the melted chocolate to allow excess melted chocolate to drip back into the bowl. Transfer the chocolate to the lined baking tray. Repeat this process with the remaining bars.
- Place the tray of bounty bars into the fridge to set the chocolate. Once the chocolate is set, remove from the fridge and drizzle the remaining dark chocolate over the bars. This step is optional and purely for decoration. You might need to warm up the chocolate again so that it is runny. If the chocolate is quite thick, you can add a small amount coconut oil to thin it out.
- Return the bars to the fridge to set completely before transferring to an airtight container and storing in the fridge for up to 4 days or in the freezer for up to 3 months.


Like this recipe? Leave a comment!